Hi everyone, happy Friday!
I love pretty embellishments. They can really ‘make’ your design. Often they’re that final finishing touch that takes a card from ‘good’ to ‘great’, gives it that wow factor, or ties everything together.
Store-bought embellishments are a great time-saver in several ways – they take a lot of the design work out for you in terms of colour combinations, style, time… but, depending on what they are, they can sometimes feel a little limiting, and/or you feel you should only use them in the way they were designed.
‘Should’ is my least favourite word in the English language. *wink*
I love finding ways to stretch my supplies – and that goes for store-bought embellishments too! You still get the convenience of a well-designed element, but you get to inject your own creativity into it as well, and perhaps even give it a new lease of life too!
I put that theory into practice when playing with some of the embellishments that came with the July Scrapbook Circle kit:
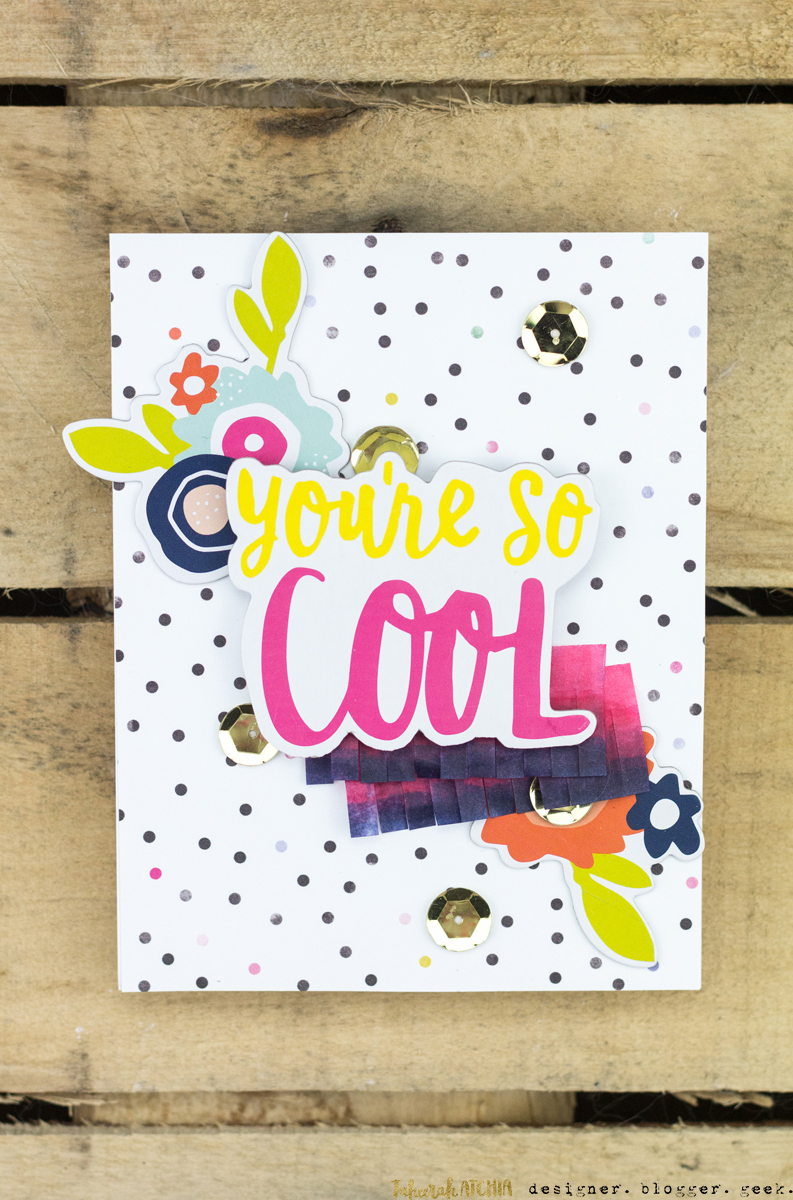
There’s so many details I love about this card. The fun, confetti-like patterned paper. The gold sequins. The overall bold feel. But let’s talk embellishments.
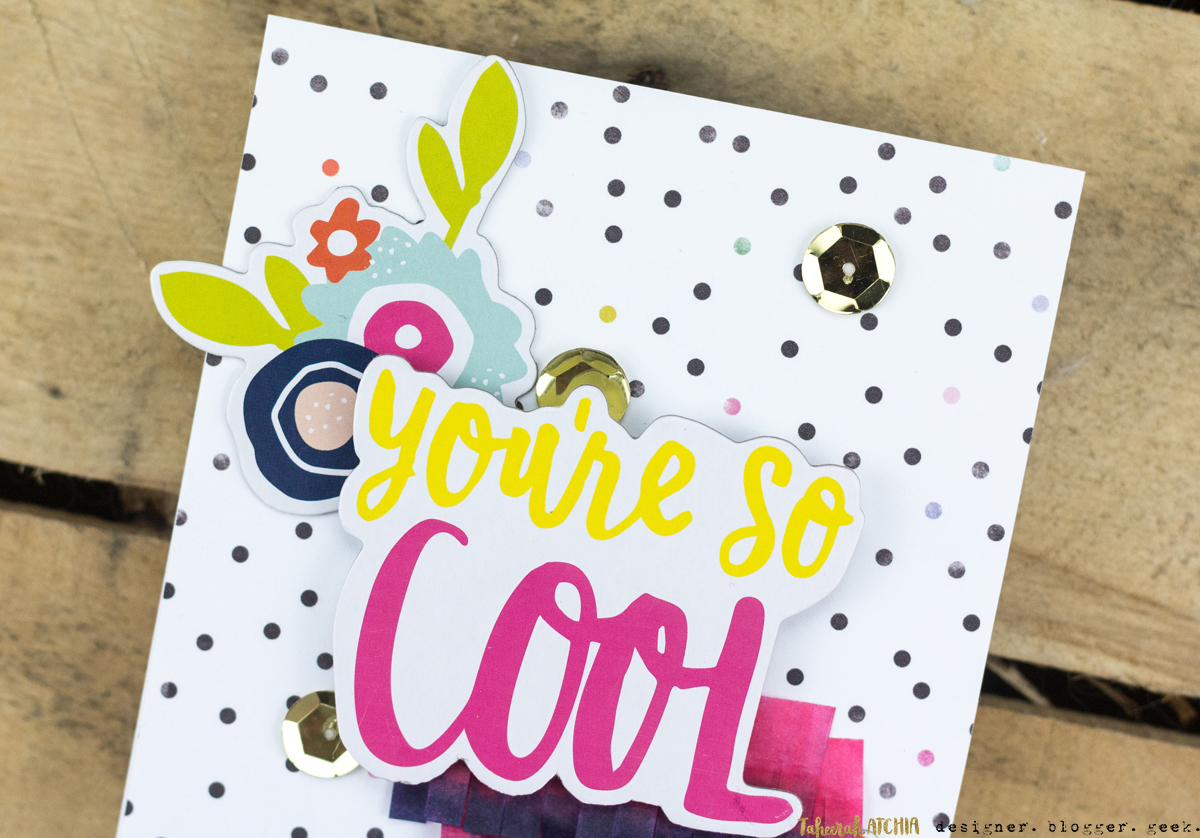
There were some really cool chipboard embellishments in the kit – phrases and some images too. I used a few of the florals here, beneath my sentiment – but the actual phrase was much larger and didn’t quite work for me (it said ‘You’re so cool I’m not even mad’). So although it seems like a really obvious thing to do when I say it, I decided to customise the sentiment by trimming it down to only use the phrase I wanted. Nothing mind-blowing here, but I don’t always think to do that with chipboard embellishments!
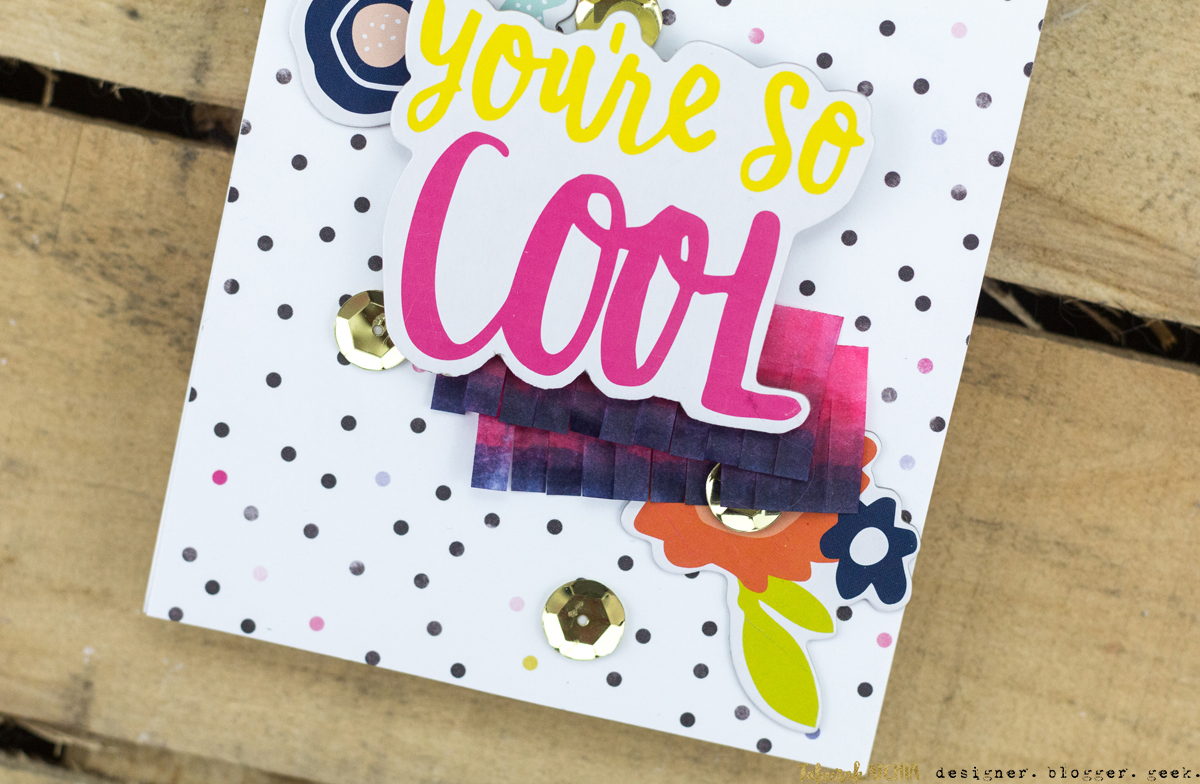
My favourite detail has to be that fringe tape though. I used the tape in its original, white format on this card here, but I really wanted it to pack a punch with this design, so a couple of Copic markers later and I had a wonderful two-tone fringe that popped perfectly with the other colours in my design!
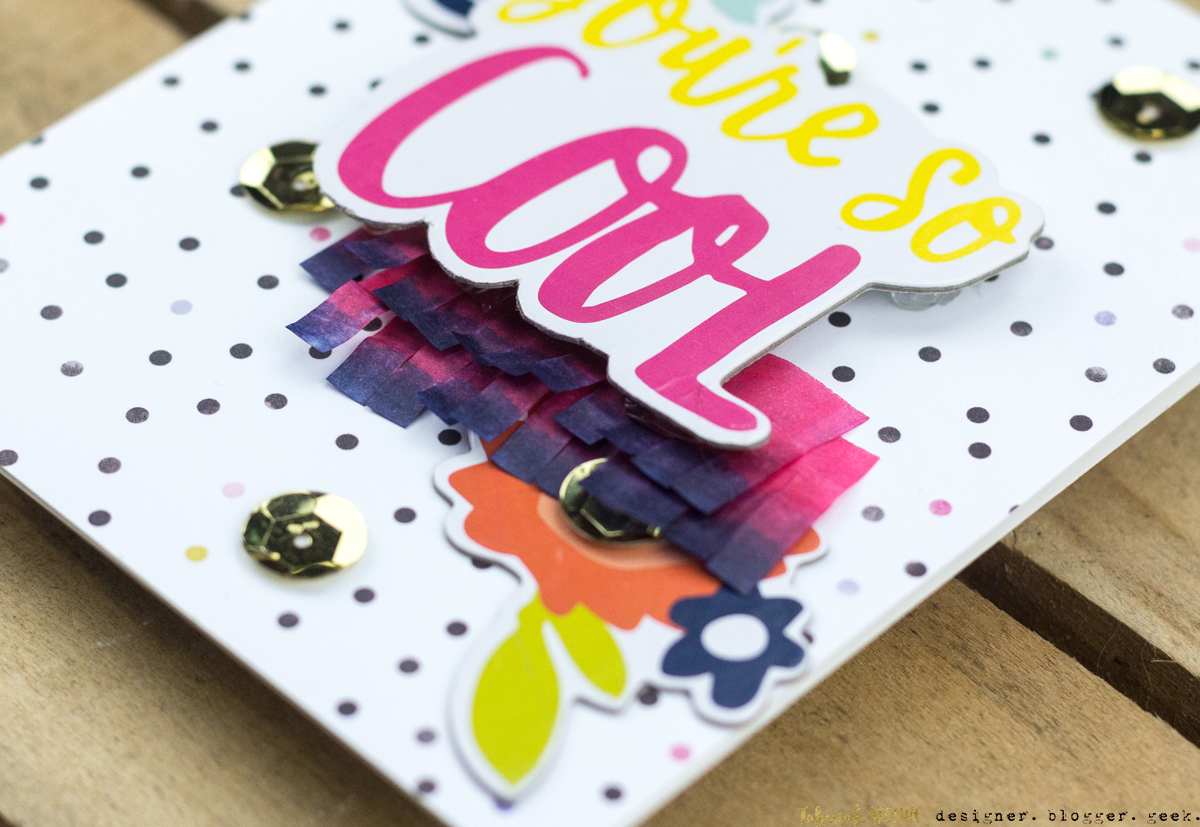
I love all the dimension in this card! Just because the chipboard embellishments were self-adhesive, it didn’t mean I had to just stick them straight down onto my base! The use of Pinflair Glue Gel really helped me get more interest in the layers, and I love that my fringe was able to peek out without being squashed!
I’ve another card on the Scrapbook Circle blog today that features a slight stretch of one more of the embellishments in the kit, so I do hope you’ll join me over there to check it out! I’ve had a ball playing with this kit and have been thrilled to design with it!
Thanks for stopping by!
Supplies
Love everything about this card! Your positioning and stylish embellishments are spot on!! Waving hi from Canada now….hugs!
So pretty, and so so fun!