Hi everyone, Happy Wednesday!
I’ve a bit of a different post for you today, but hopefully you’ll still find it interesting as it still involves creating pretty things with paper!
I was contacted last year about a new book about to hit the shelves and was asked if I’d like to receive the book and review it.
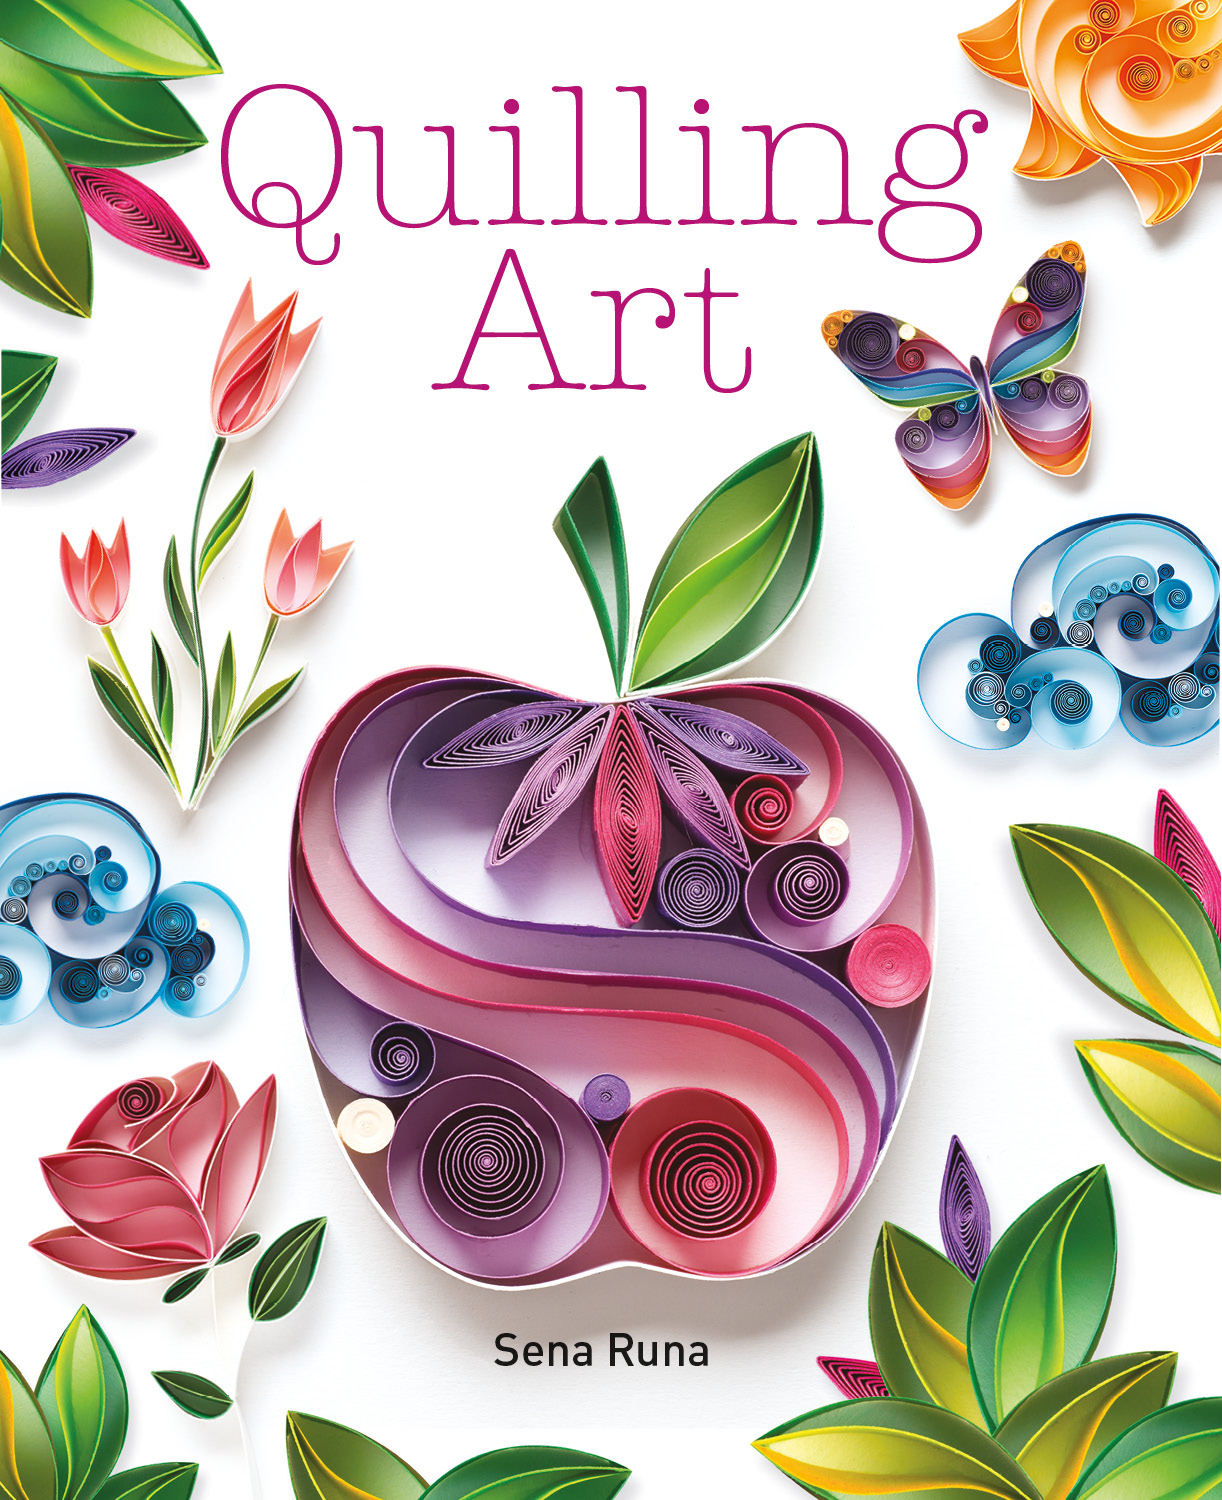
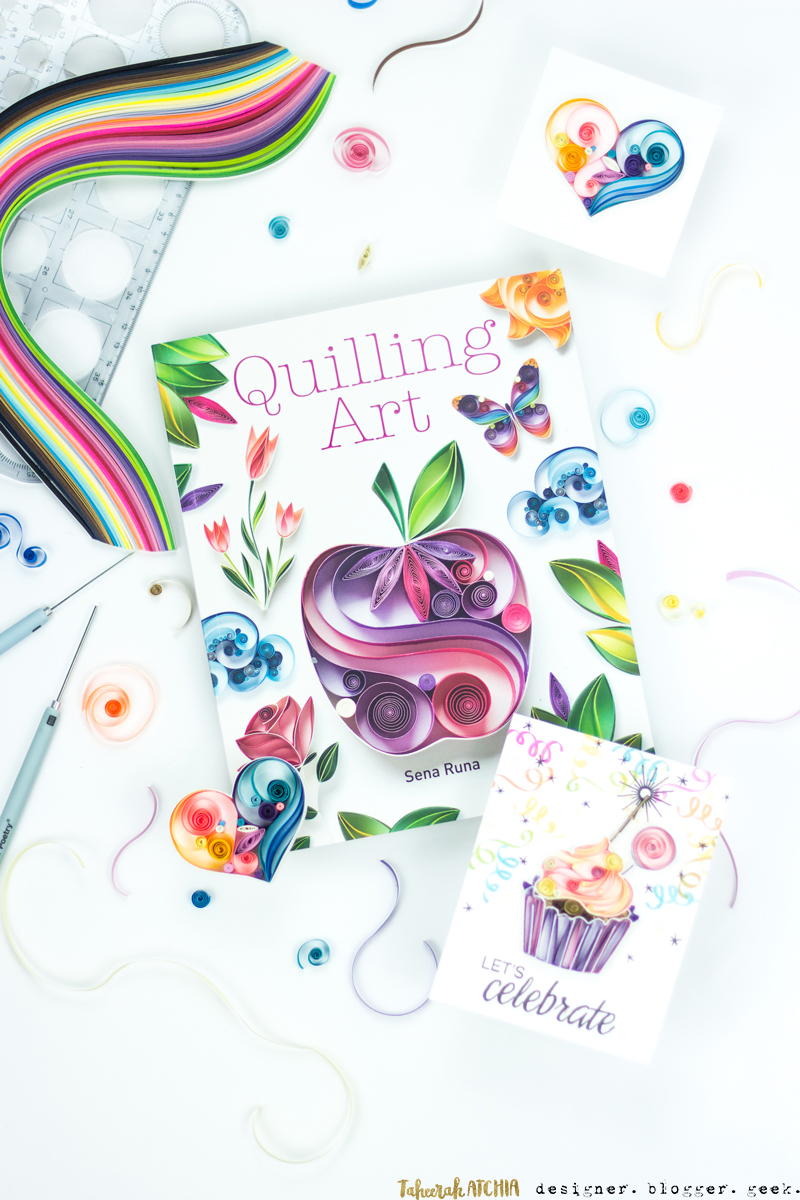
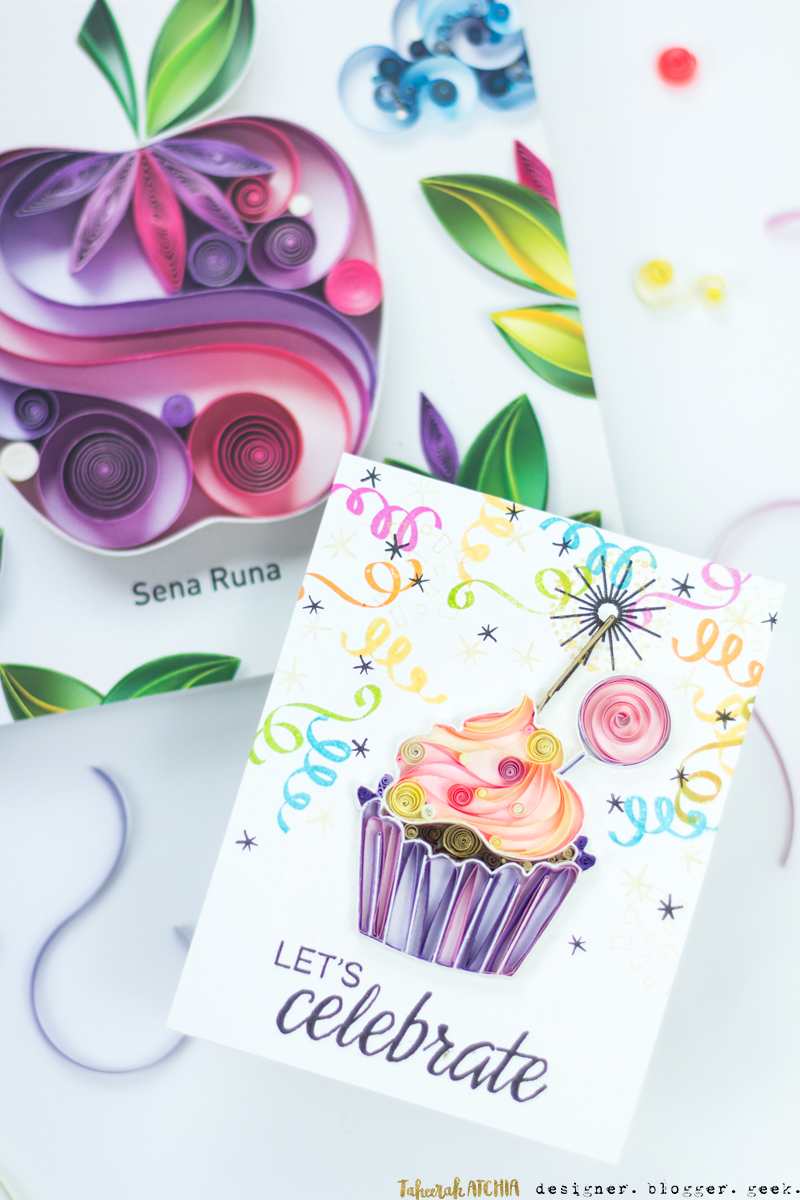
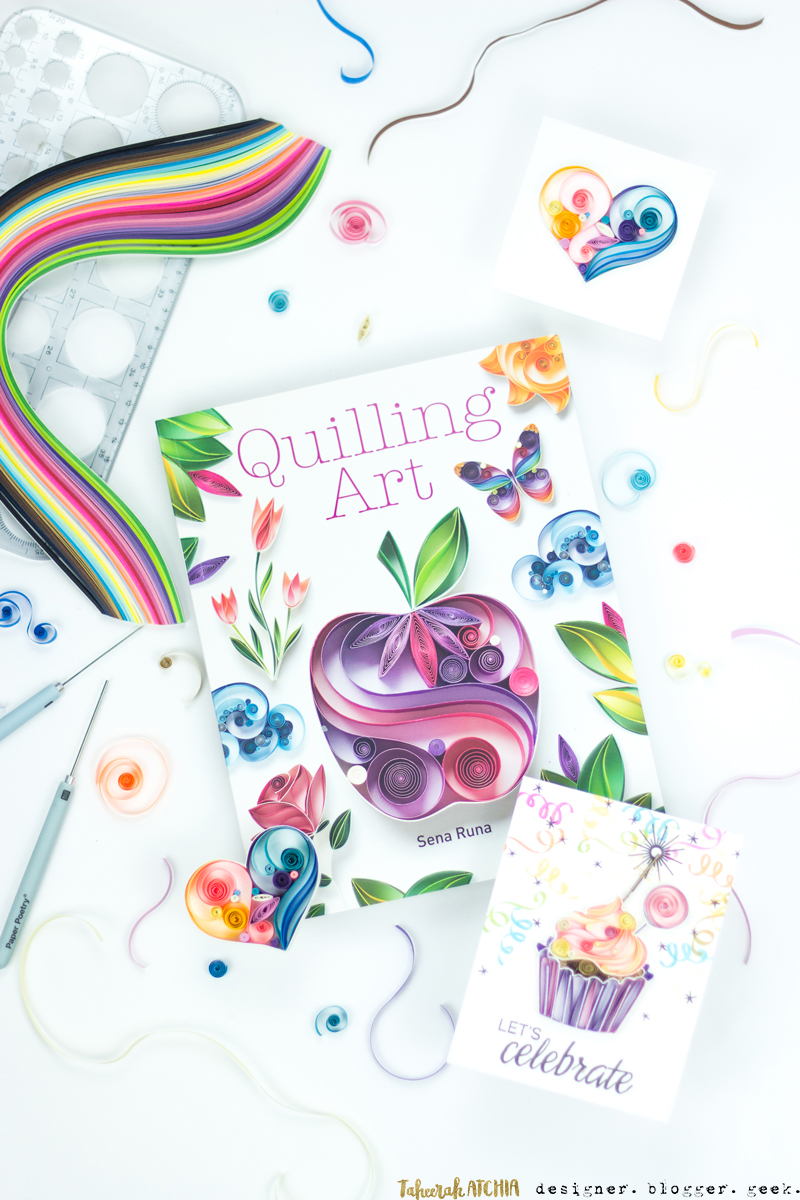
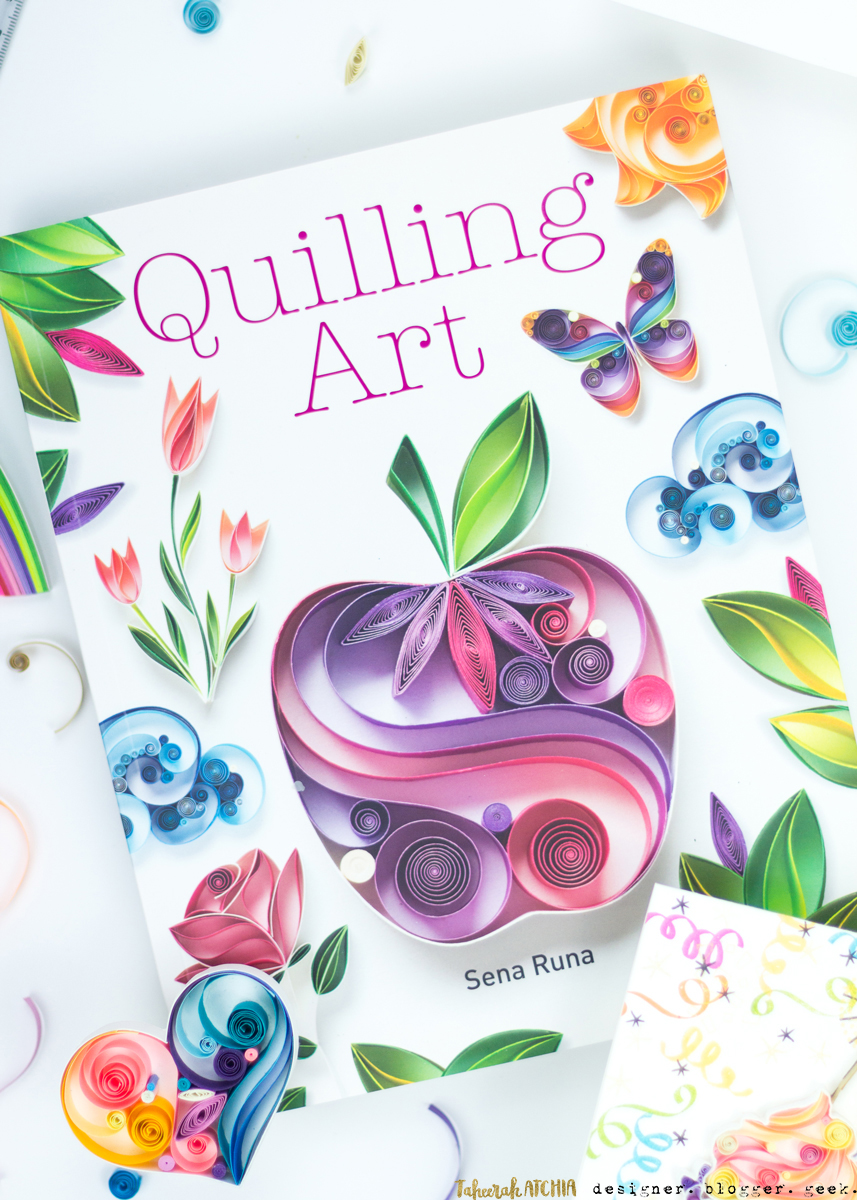
Quilling Art by Sena Runa, published by GMC (£14.99, available from www.thegmcgroup.com) takes on an exploration of quilling, the art of creating designs using curled strips of paper. Here’s the blurb from inside the cover:
“Unleash your creativity and follow the illustrated steps in this fabulous book to make 20 beautifully stylised quilled designs. Sena Runa uses bright pops of colour and graduating shades to create exciting effects and guaranteed impact. The projects look striking framed or make wonderful greeting cards. They can also be hung by ribbons and used as decorations around the home.
Once you have mastered the techniques, you can use them to create your own unique designs. They make fantastic gifts for loved ones and offer the perfect way to mark an occasion such as a christening, anniversary or college graduation. The possibilities are endless with this relaxing and absorbing craft.”
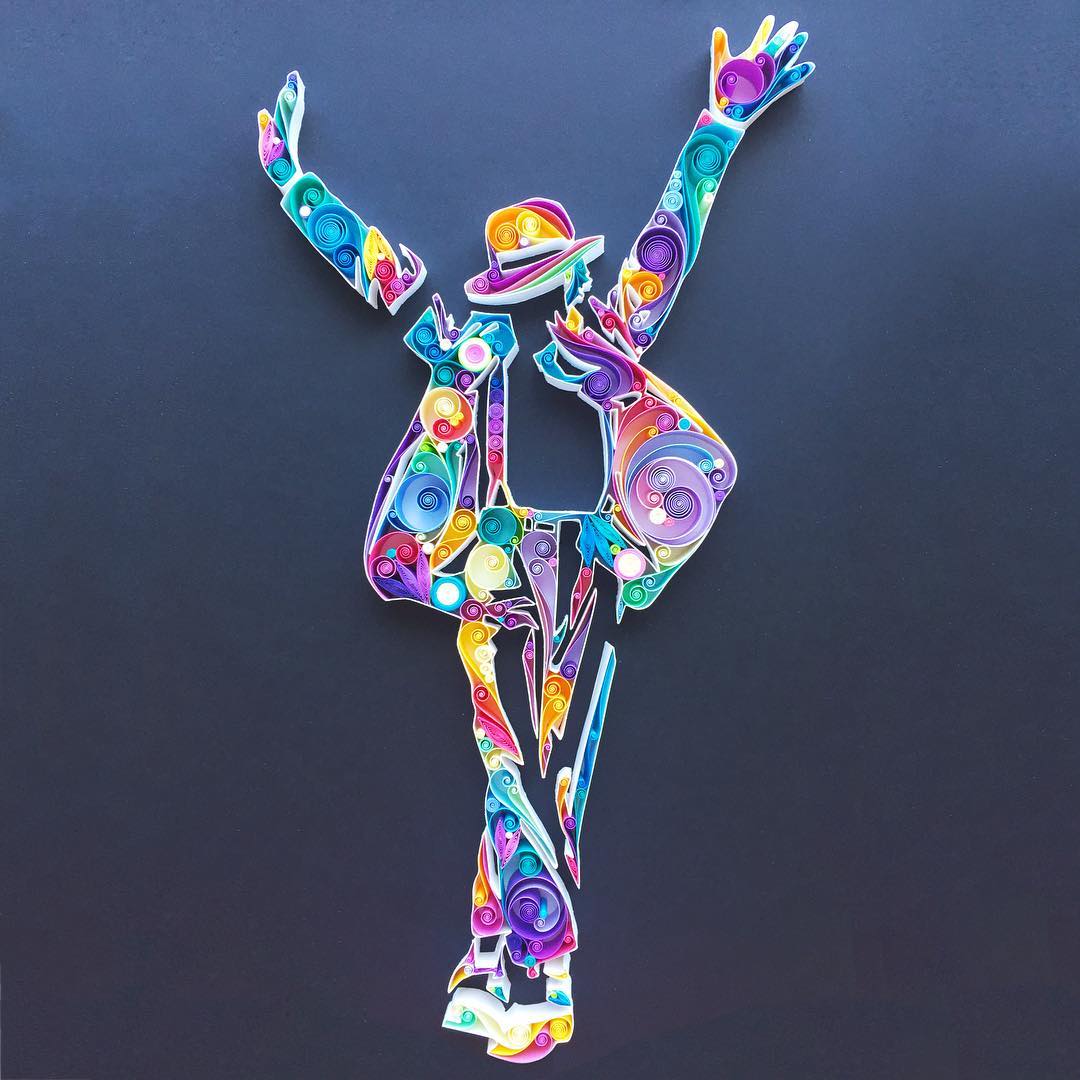
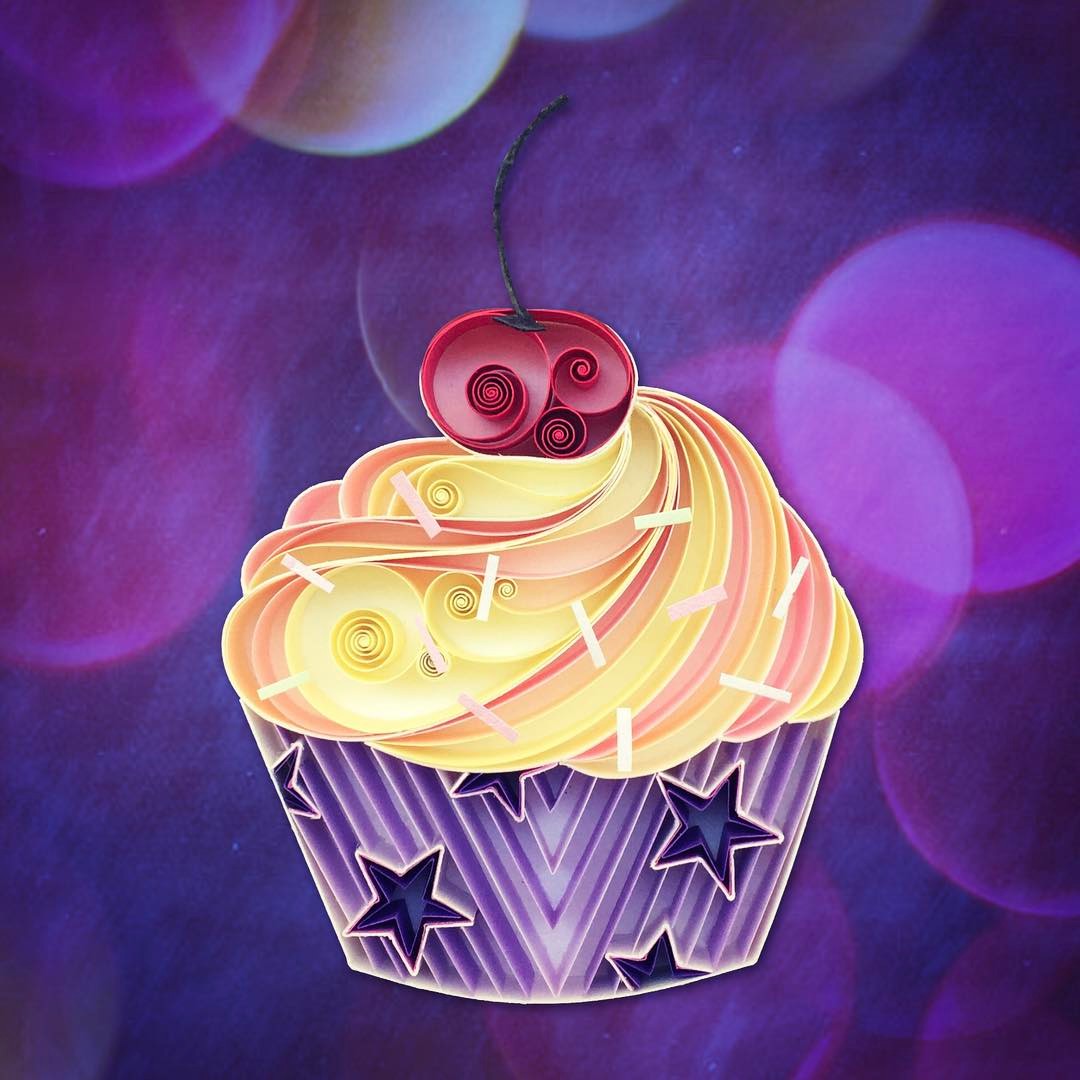
Having done some quilling when I was a child I was intrigued, so I hopped over to Sena’s Instagram to check out her work – and was immediately blown away.
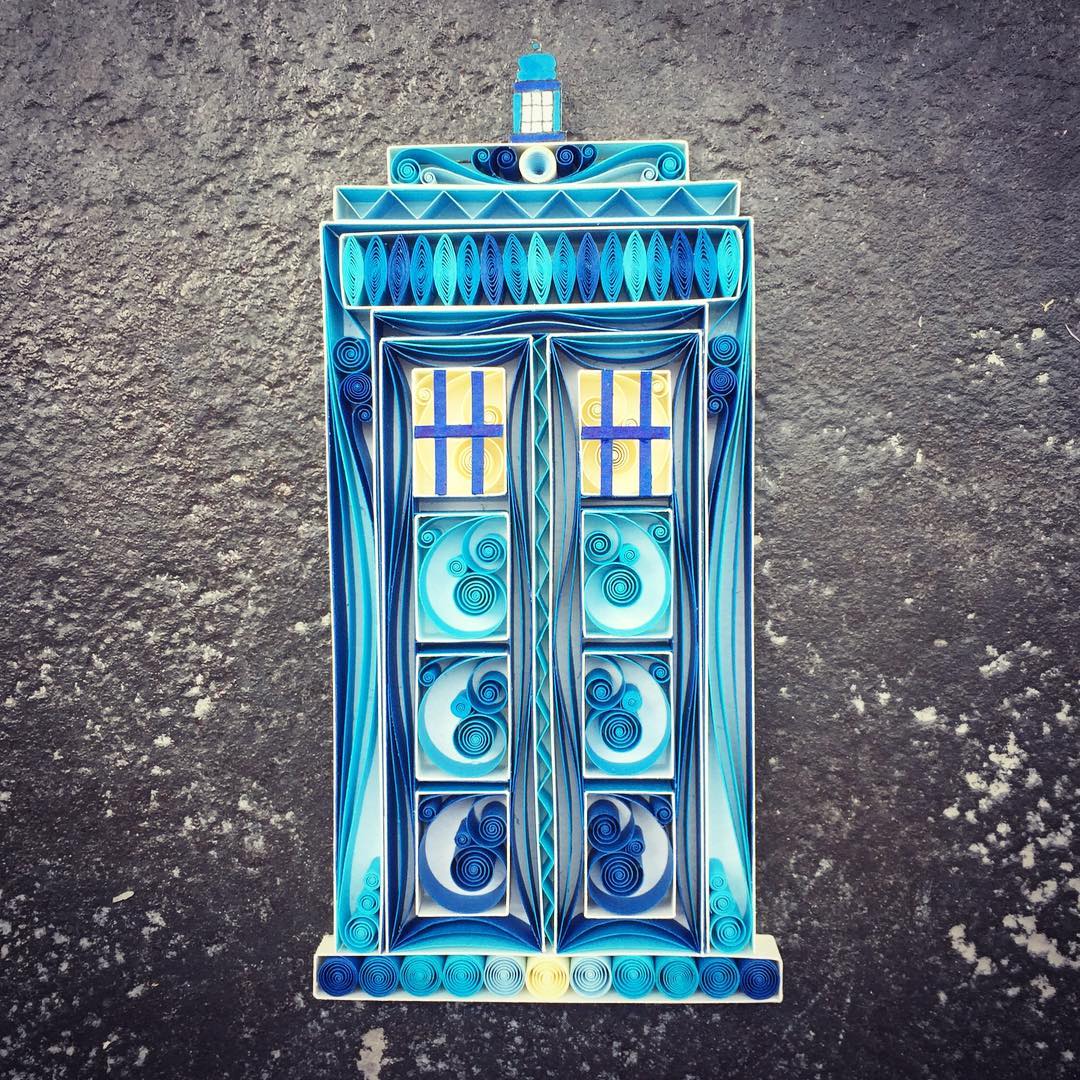
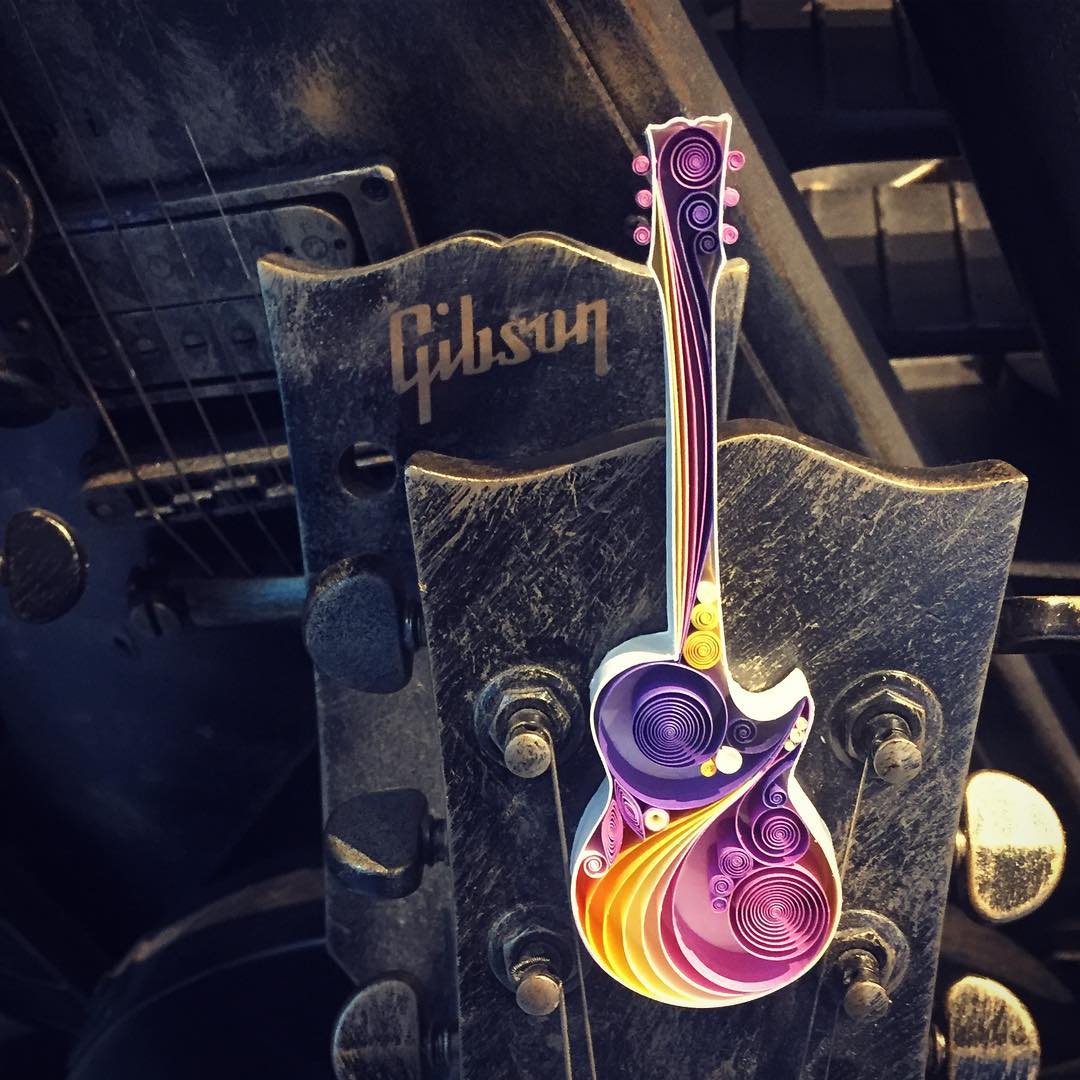
 (All images © Sena Runa)
These were not the designs I’d created in my youth with a quilling kit. These were true works of art; bursting with colour, imagination, movement, and talent. A book, written by the same designer, that would teach me how to create like her? Sign me up!
Disclosure: I received a copy of this book in order to review it. I was not asked to endorse or praise the book or its contents, or Sena’s work itself. All opinions expressed in this review are my own, and my review is an honest, objective view of the book and my experiences of using it.
Want to create like Sena too? Stay tuned to the end of this post for a giveaway!
Tooling Up
I decided that the best way to review Quilling Art was to put it through its paces – crafting style!
And that meant tooling up to get the supplies I needed before getting started.
A quick search through Amazon and I found a bunch of quilling supplies that didn’t cost the Earth. The designs in Sena’s book all use 1cm wide strips, but this is not compulsory.
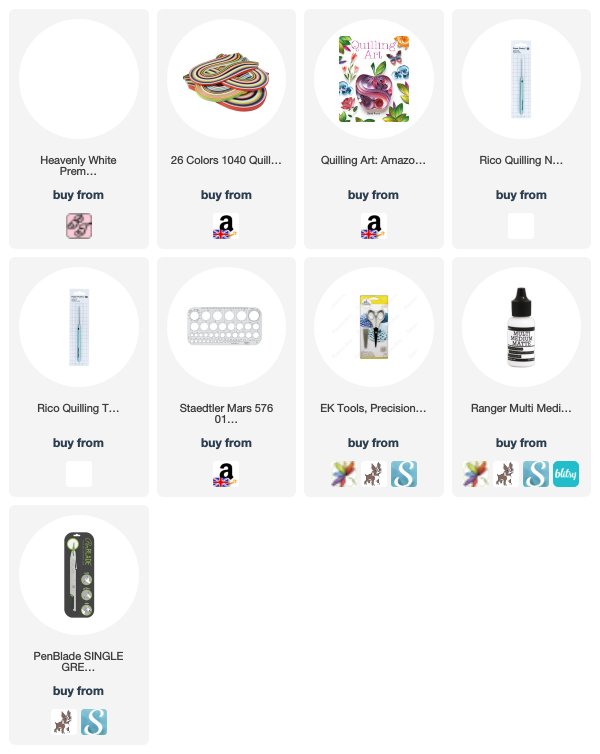
I purchased:
- a pack of strips that contained a variety of widths (including 1cm)
- a quilling tool and quilling needle (using the suppliers list in the book to find ones I liked as I didn’t want the ones on Amazon)
- a circular ruler (basically one of those plastic tools with lots of circles of different widths – used in quilling to check the diameter of your coils)
and - some yet-to-arrive tweezers (just because I liked the look of them).
If you’re a cardmaker you probably already have a ton of adhesives (I used Multi Matte Medium with a fine nozzle tip for these projects) and obviously I already had cardstock, scissors and a craft knife. The outlay for specific quilling supplies was not significant, and you can quill using your fingers so you don’t even need the quilling tool if you wish. I found a craft pick/poking tool worked in place of a quilling needle (and actually preferred it), and I used vellum in place of tracing paper to trace the templates. So really the only supplies I *had* to purchase were the strips and the circular ruler. What can I say? Evidently my crafting spending habits aren’t limited to stamps. *wink*
Getting Started
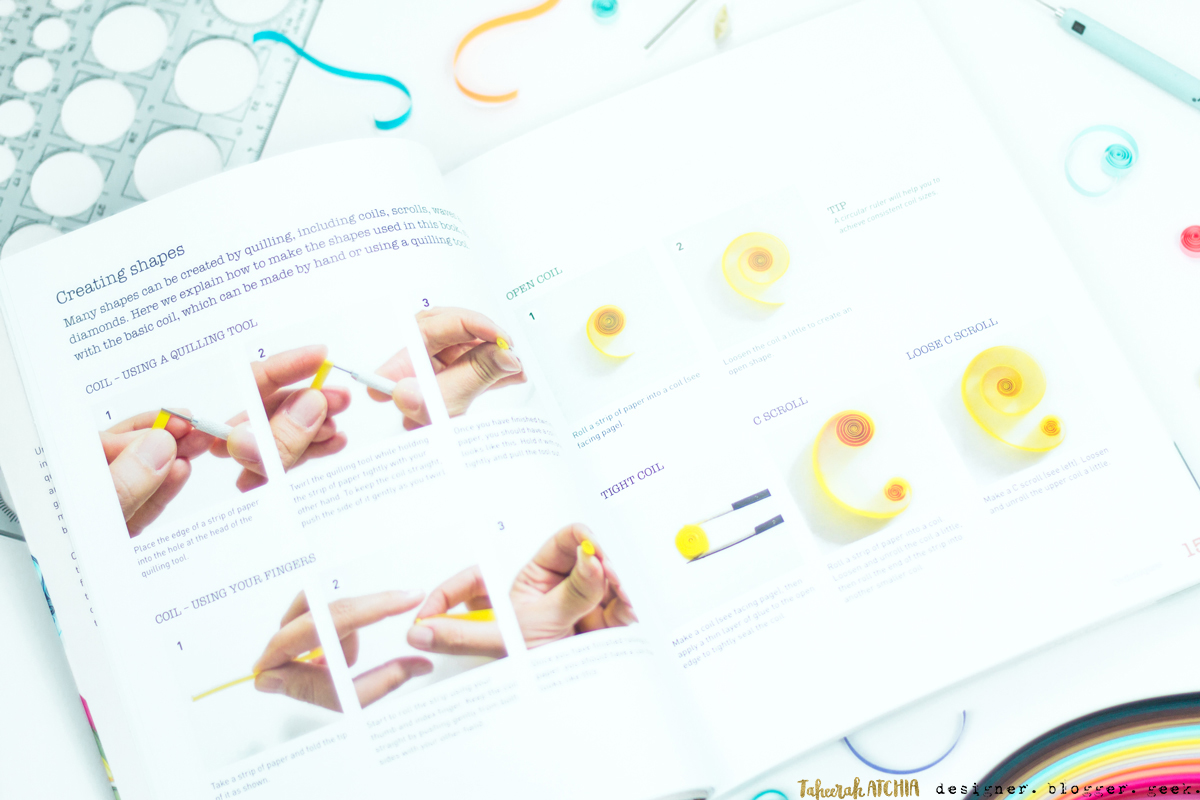
The book starts with an Introduction and a listing of Tools and Materials, before diving into a ten page section on Techniques.
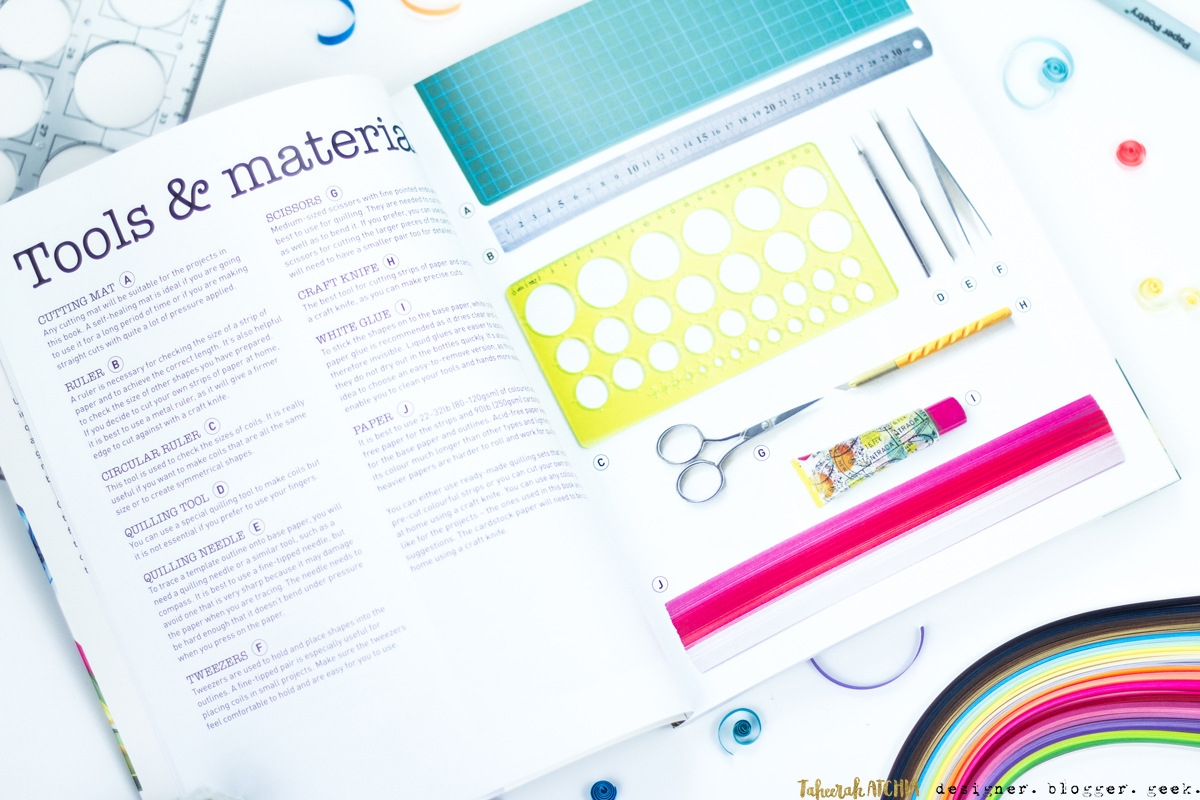
The Techniques section covers how to create a cardstock outline (which you then fill with quilled strips to create your design), a tour of how to create the various quilled shapes, and how to measure and place the shapes to fill the outline.
Having done some quilling before the basics were familiar to me, however my one piece of advice would be to not skip this section even if you’re a novice or experienced quilling artist. I skimmed this section on first read and it meant I made a few mistakes later on when recreating one of the designs. Lesson learned!
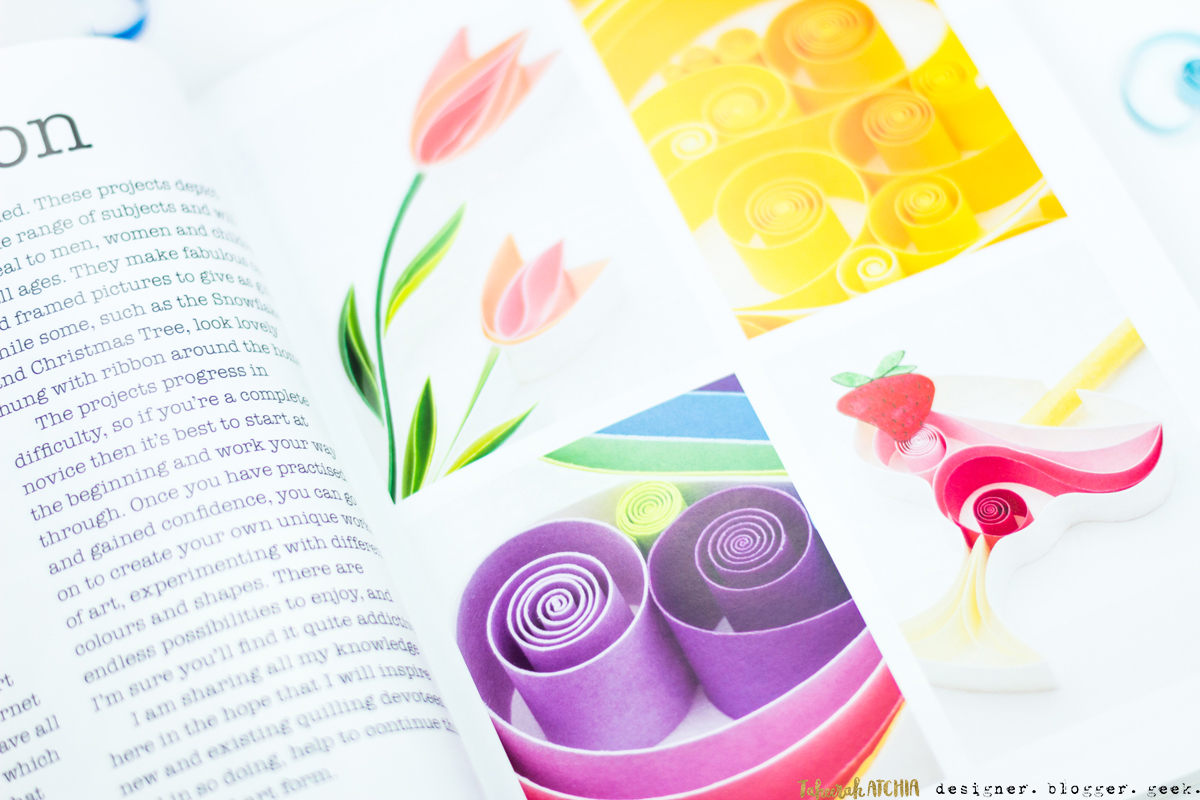
After you’ve (ahem) read the Techniques section, the remainder of the book focuses on 20 different designs you can recreate. The designs are nothing short of gorgeous – bright, modern, quirky, and challenging. The difficulty level increases as you progress through the book, so complete beginners should start with the first project before attempting something more ambitious.
Each design is illustrated with step-by-step photographs and instruction set. The instructions were clear and easy to follow, and once familiar with the quilled shapes I was able to progress a bit faster. Where a specific quilled shape is used the instructions reference which page to find it. I found this useful but it got a little annoying having to flip back and forth as it disrupted the flow of the creation process. Once you’re familiar with the shapes this is no longer a problem though.
There is a Templates section bringing up the rear of the book, with templates represented at full size for you to trace, cut out, or photocopy. I found a number of the templates to be a bit small for my liking which meant that the designs themselves could be a little fiddly to create, especially for a beginner. You could get around this by photocopying the designs at a larger scale, or using the outline shown at the beginning of each project (which were often at a larger scale than the templates themselves).
Recreating A Quilled Design from The Book
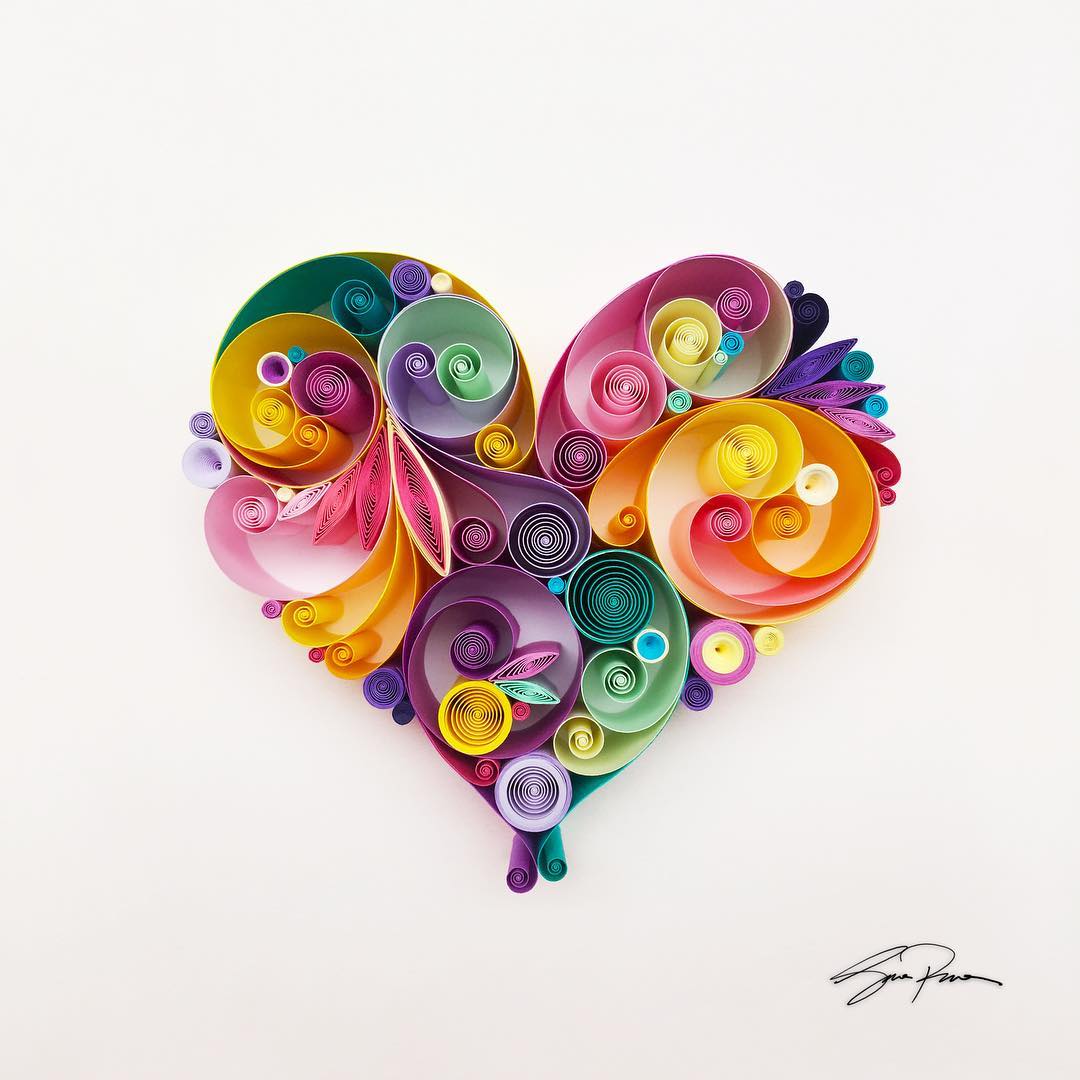
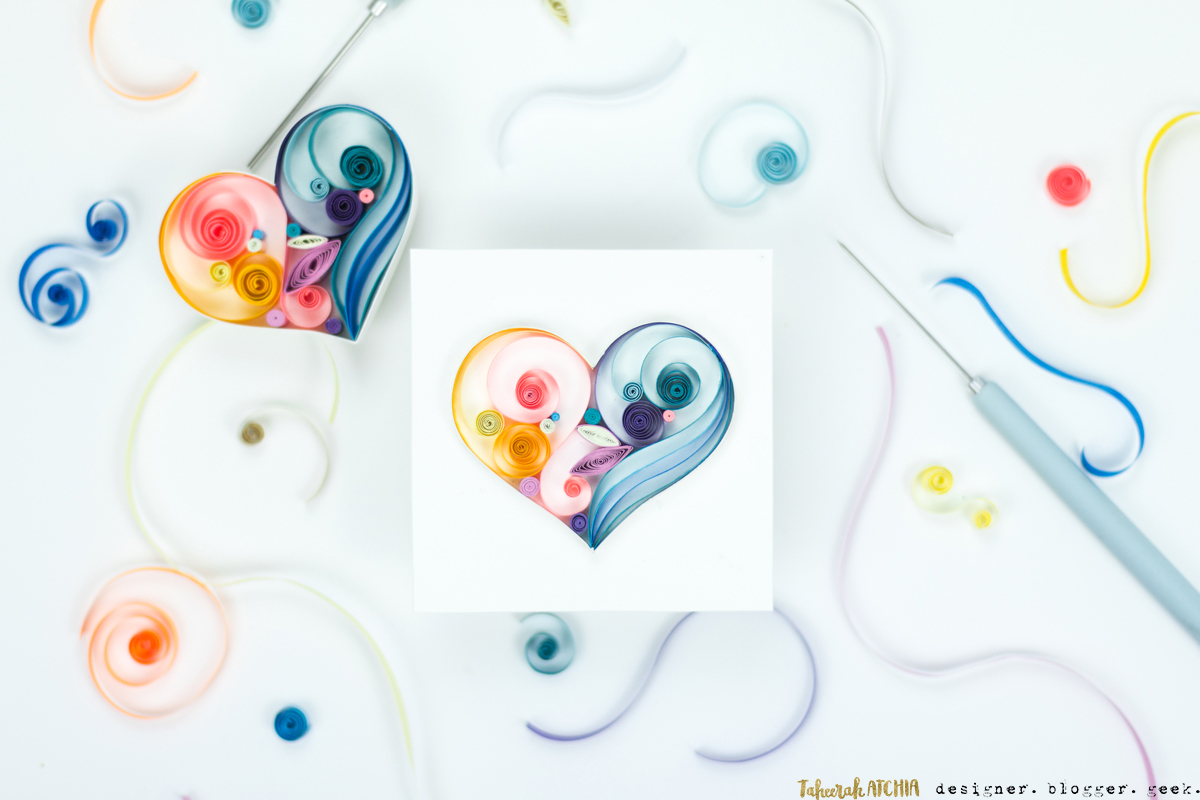
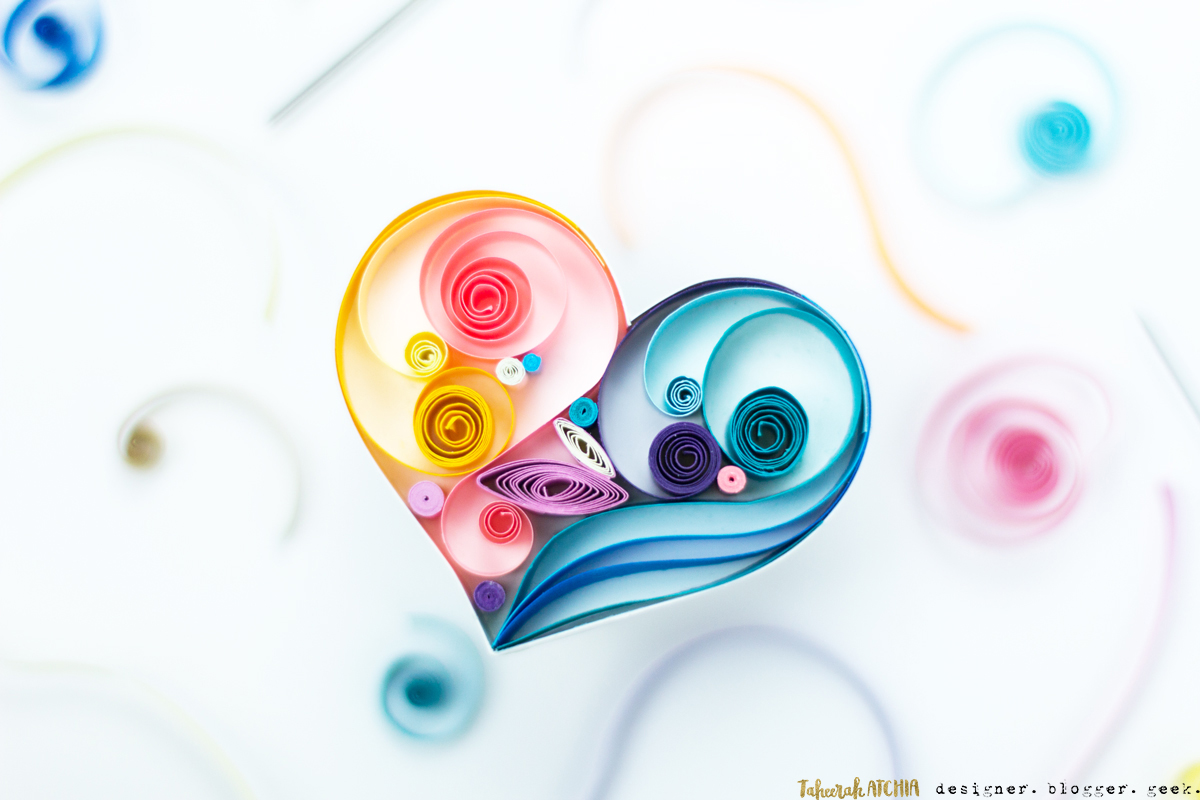
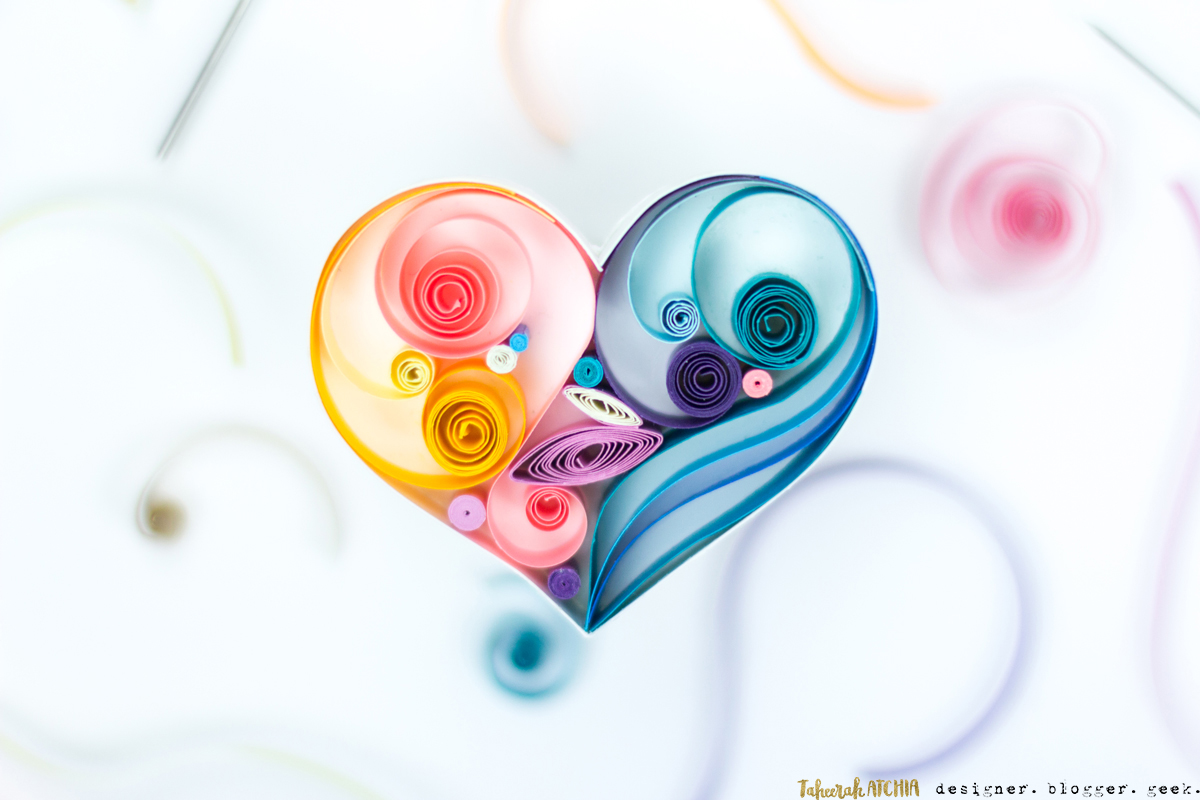
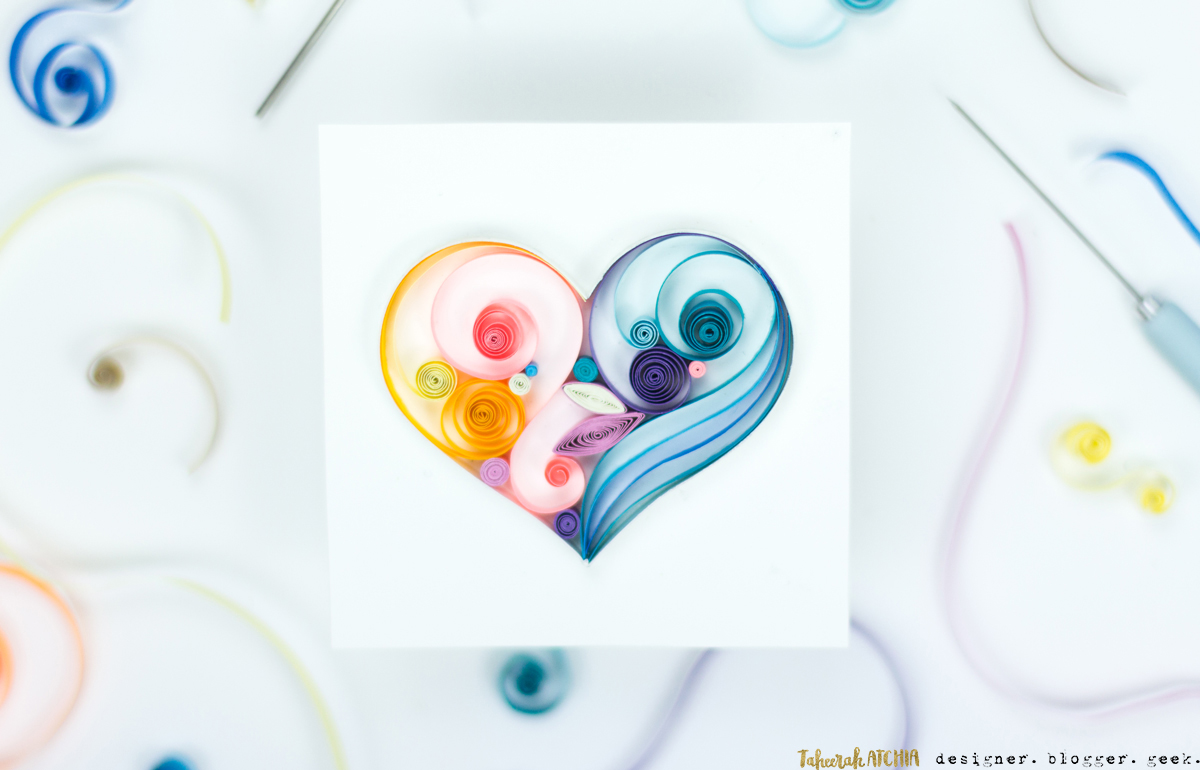
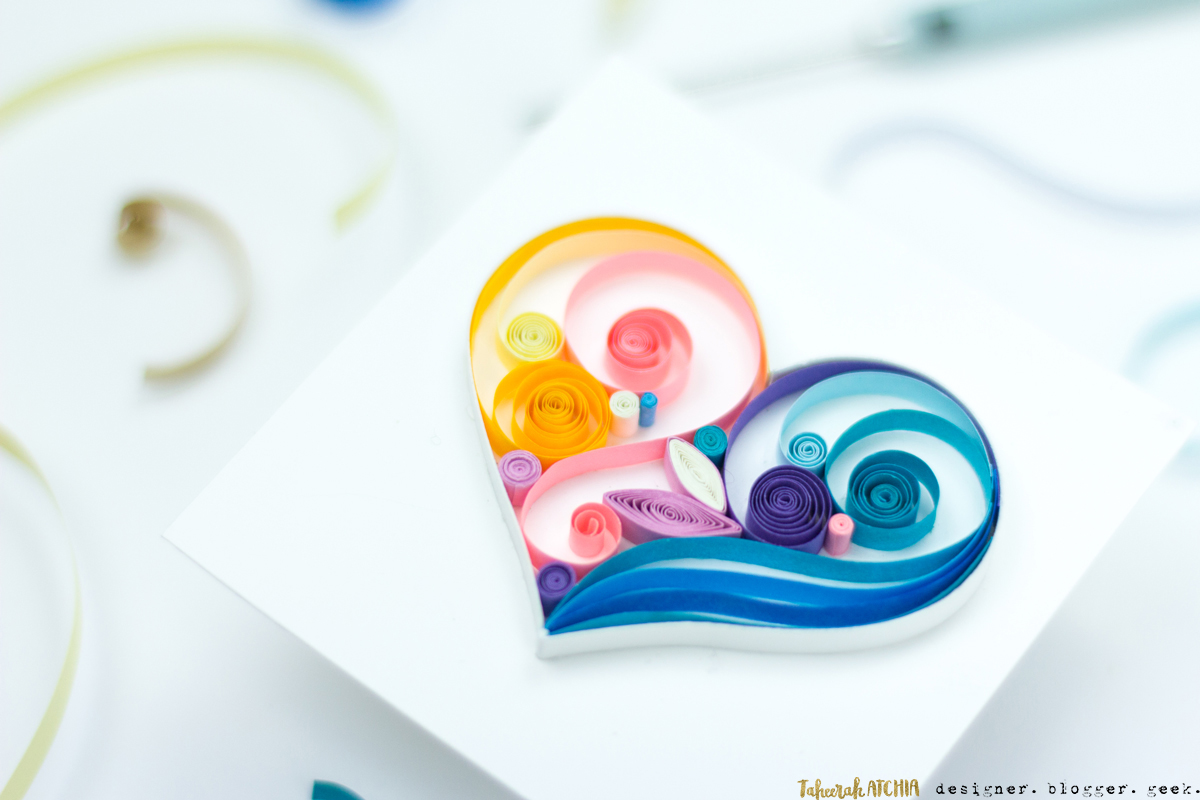
I decided to recreate the heart design from the book.
The opening page for each design starts by listing the supplies needed. I found it useful that it listed the different colours of strips used, although the names of the colours are a bit subjective in my opinion (‘violet’ looked more purple to me, and just how dark is ‘dark blue’?). Any strips that I didn’t have the right colours for I ‘created’ myself by colouring a strip with Copic markers.
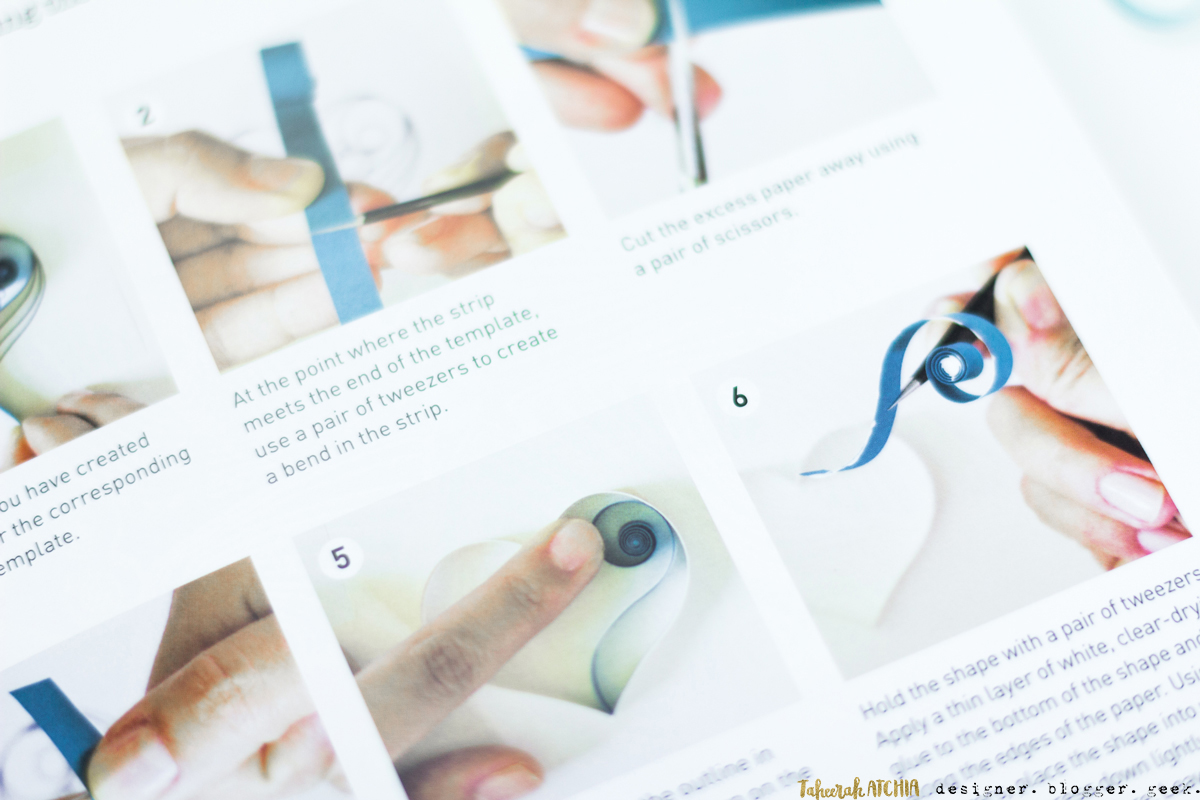
The book says to trace the outline of the template onto a piece of cardstock by using a quilling needle to deboss/scratch the design into it. I found this method to be a little inaccurate in application and personally didn’t really like scratching the design in, particularly as the lines were then very difficult to see. Tracing the design lightly with pencil might be easier on the eyes and on the wrist next time. But the method does work. The instructions say to just trace out the outline of the shape, but as a beginner/novice I really think you need to include all of the loops and coils as well so you have an idea where to place them.
I found gluing the outline and coils to the base to be somewhat fiddly and frustrating. My cardstock is a little heavier weight than the book recommends, which did not help. The instructions say to apply glue to the edge of the cardstock/paper and then glue it to the base. For a beginner/novice I found it easier to apply glue to the base, using the traced template as a guide, and adhering the shapes in that way. This meant less instances of my paper or cardstock moving and adding extra little lines of glue to my base when the shapes ‘misbehaved’.
I found creating the coils to be straightforward enough, though I did find that for a couple of the shapes I needed a longer length of paper to create the design as closely to the original as possible. For an experienced quiller such as Sena she can probably do the same thing with the lengths listed, but I’m still finding my feet fingers with this. *wink*
The heart took me a good while (maybe 90mins?) to create the first time. I wasn’t completely happy with my results as I was still learning how to approach the design and I kept making mistakes. My coils weren’t tight enough/the right shape sometimes, and I used too much paper in some places. Other times I just couldn’t get the shapes to match the perfect example in the book, so I was a little frustrated.
I made a second attempt though (with thinner strips) and was much happier with that.
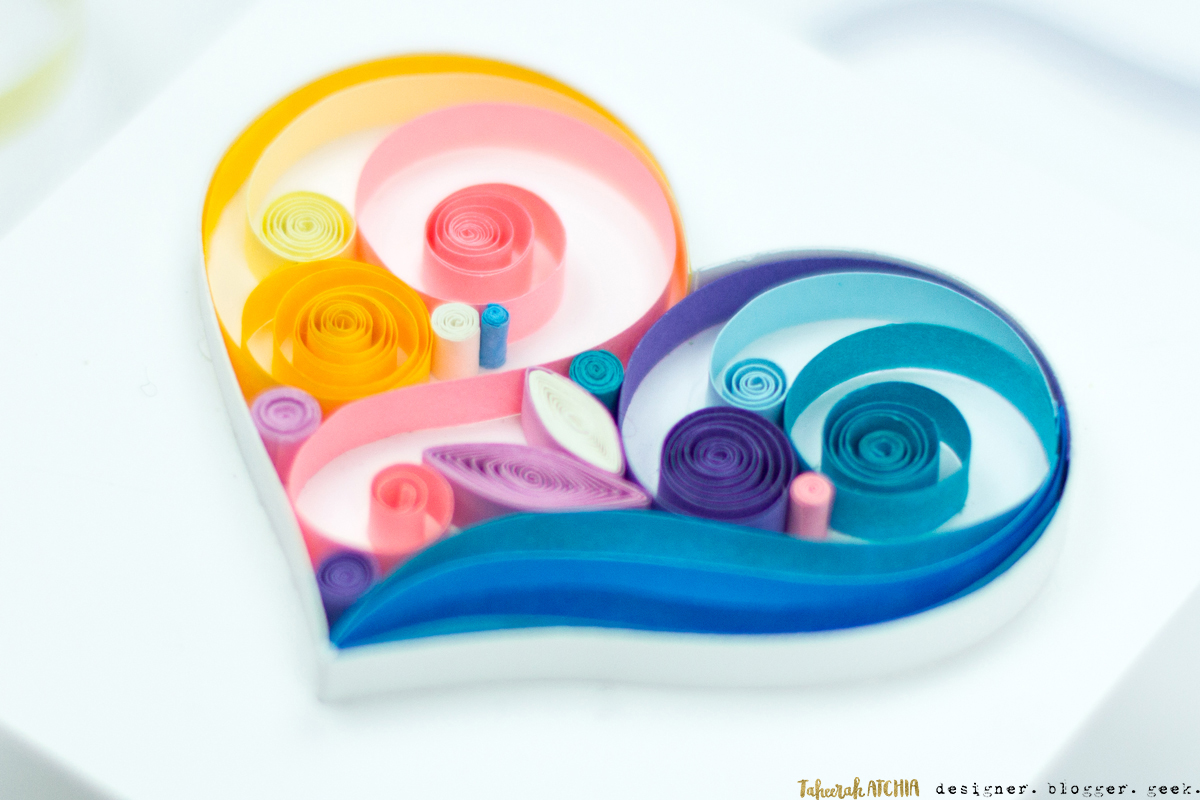
Much better! Tighter coils, better placement, more accurate shapes… practice really does make perfect!
Going Beyond The Book
The book promised me that I could create my own unique designs once I’d mastered the basics – so I decided to do just that. Instead of tracing a design onto a card though, I thought I’d pick out an outline stamp and stamp that in place and use that to create my outline, then fill the shape in with loops and coils in a more experimental manner.
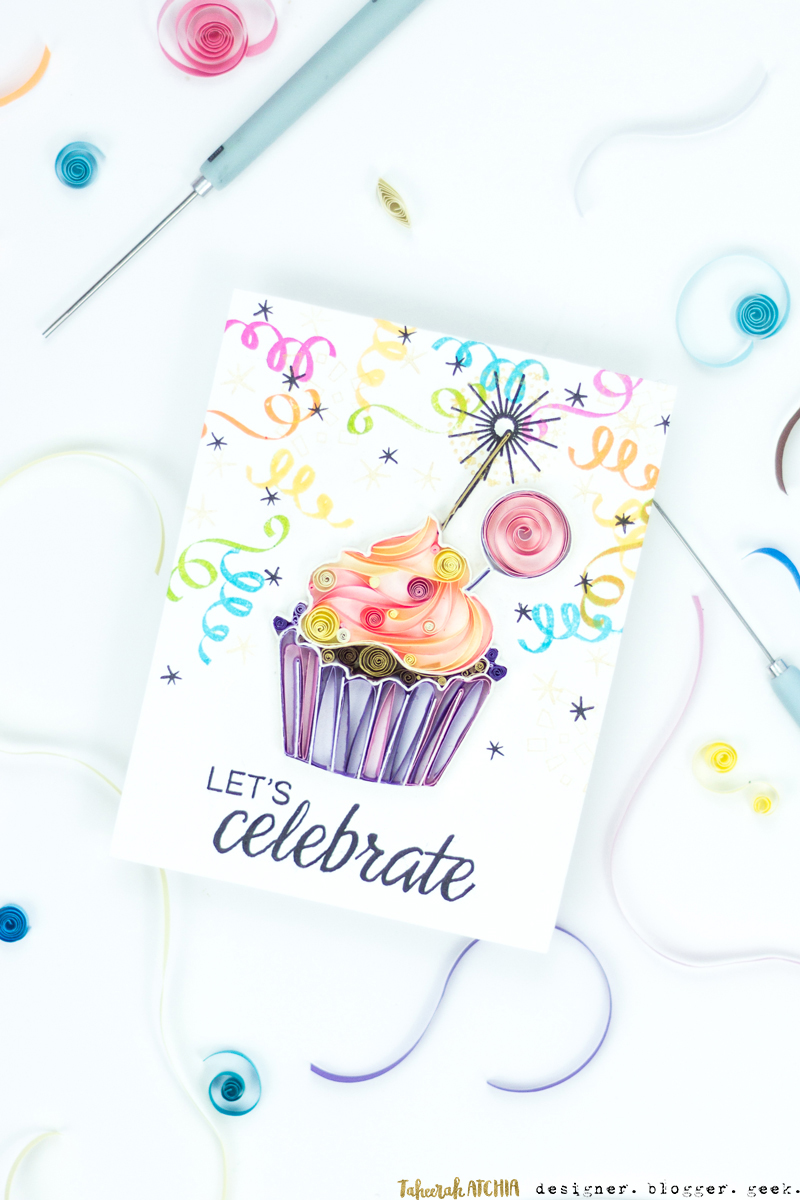
I’m pretty thrilled with the results of this, especially as it was only my third quilled project since leafing through Sena’s book!
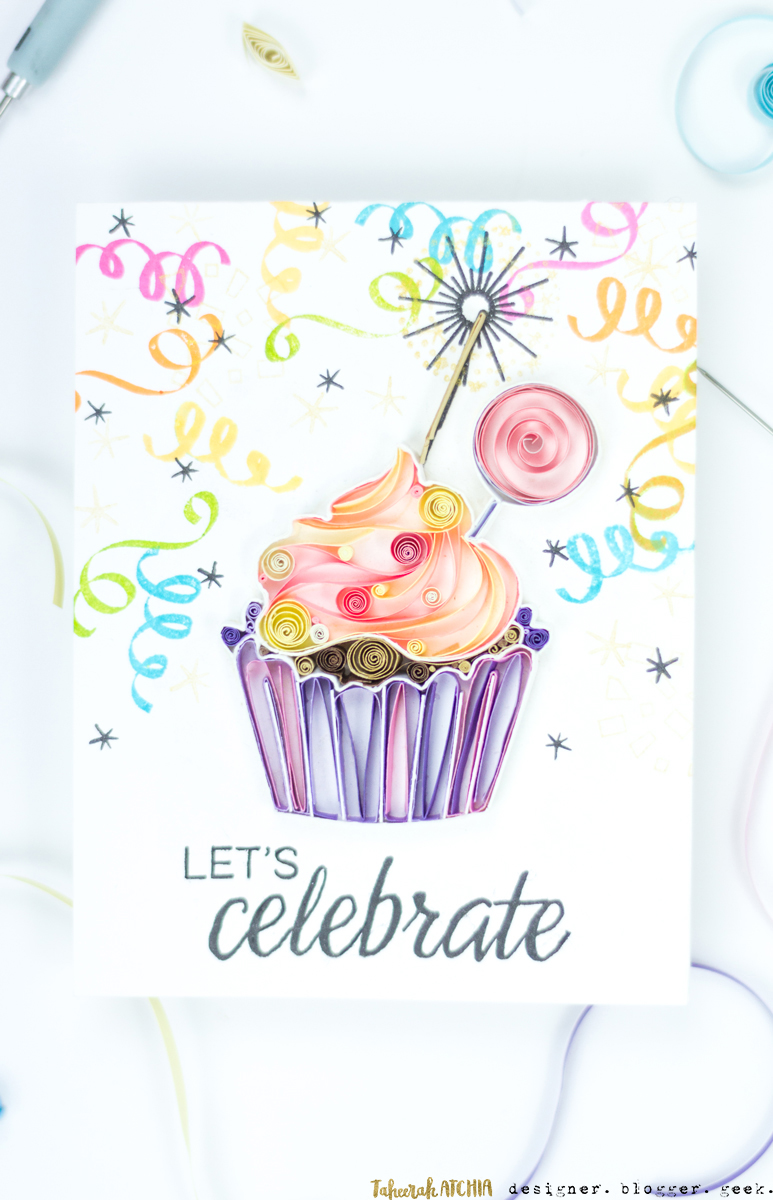
I started by stamping the cupcake from the Winnie & Walter Wish Big with Evelin T stamp set. I stamped it with Antique Linen Distress Ink so that the outline was visible, but faint. I masked the cupcake and added the lollipop from the Sweet Holiday with Evelin T stamp set, and the sparkler from the Sparkle set. I then watercoloured the base lightly with a mix of mists, and finally stamped all my confetti and sparkles from The Party set (and a few stars from Sparkle too).
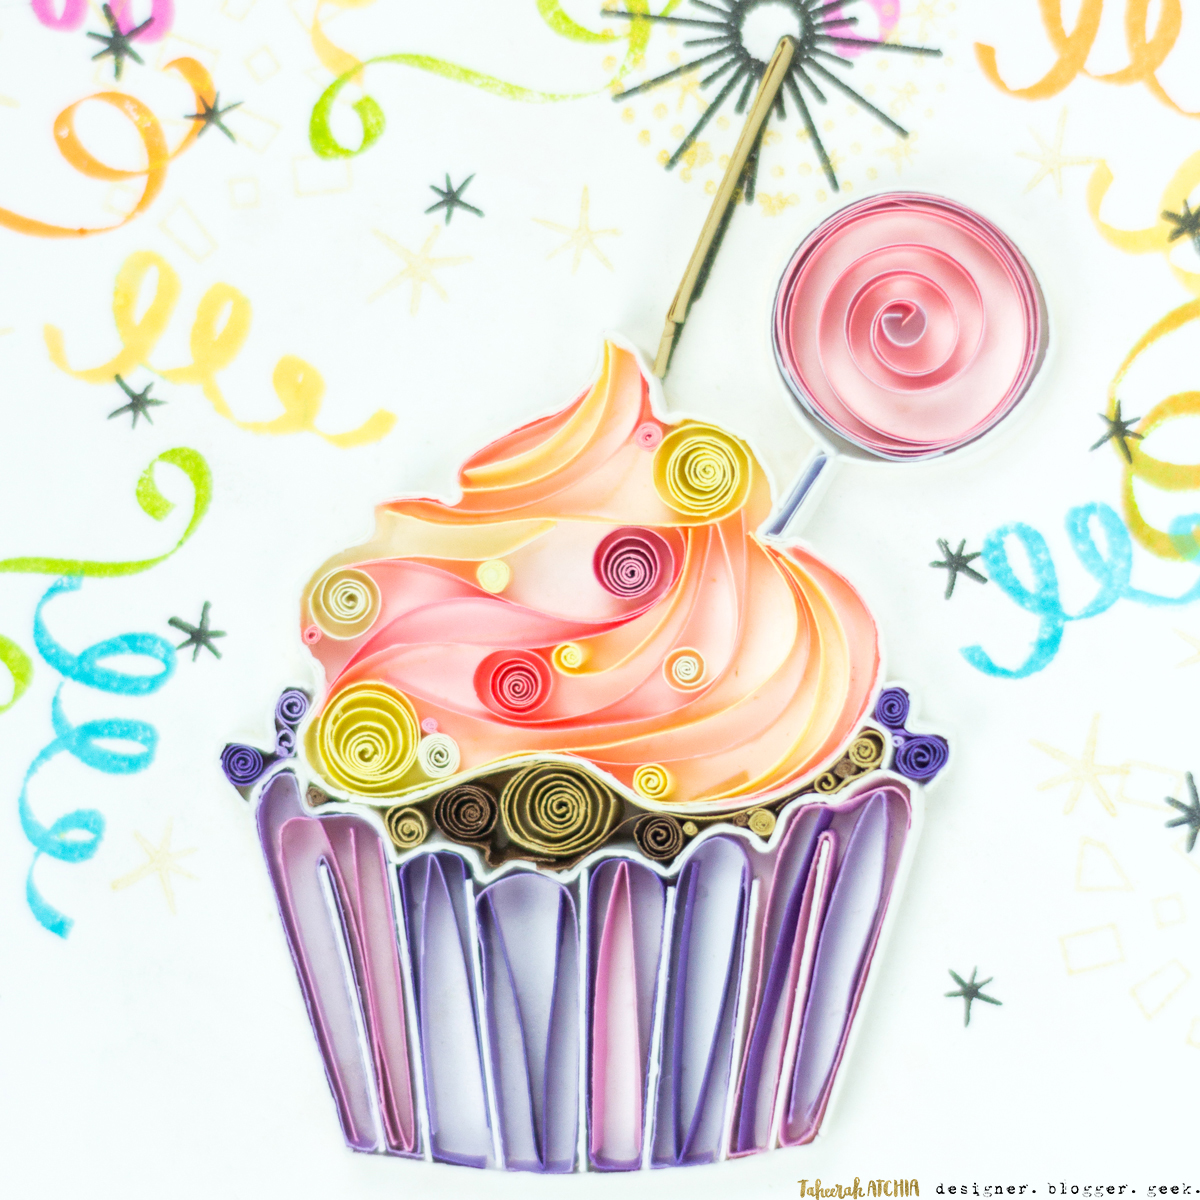
With my design all finished, it was time to build my quilled shape. I started with the outline, gluing 5mm strips of cardstock to form the shape. Once that was done I picked out some colourful quilling strips and just went where the inspiration took me.
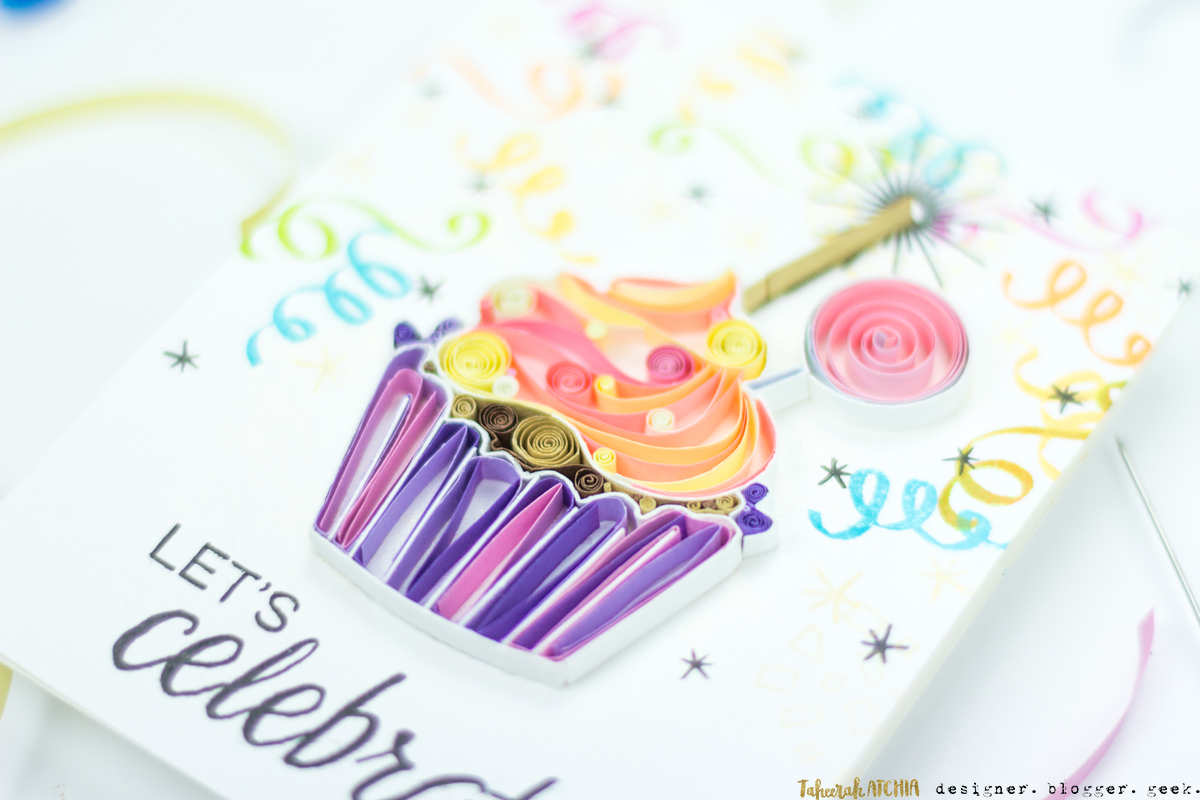
I was able to use some of the stamped lines of the frosting to guide some placement, but most of this was planning what type of swirls and coils to place where and just going for it! This time I did apply the adhesive to the paper and then adhere to the base, rather than the other way round.
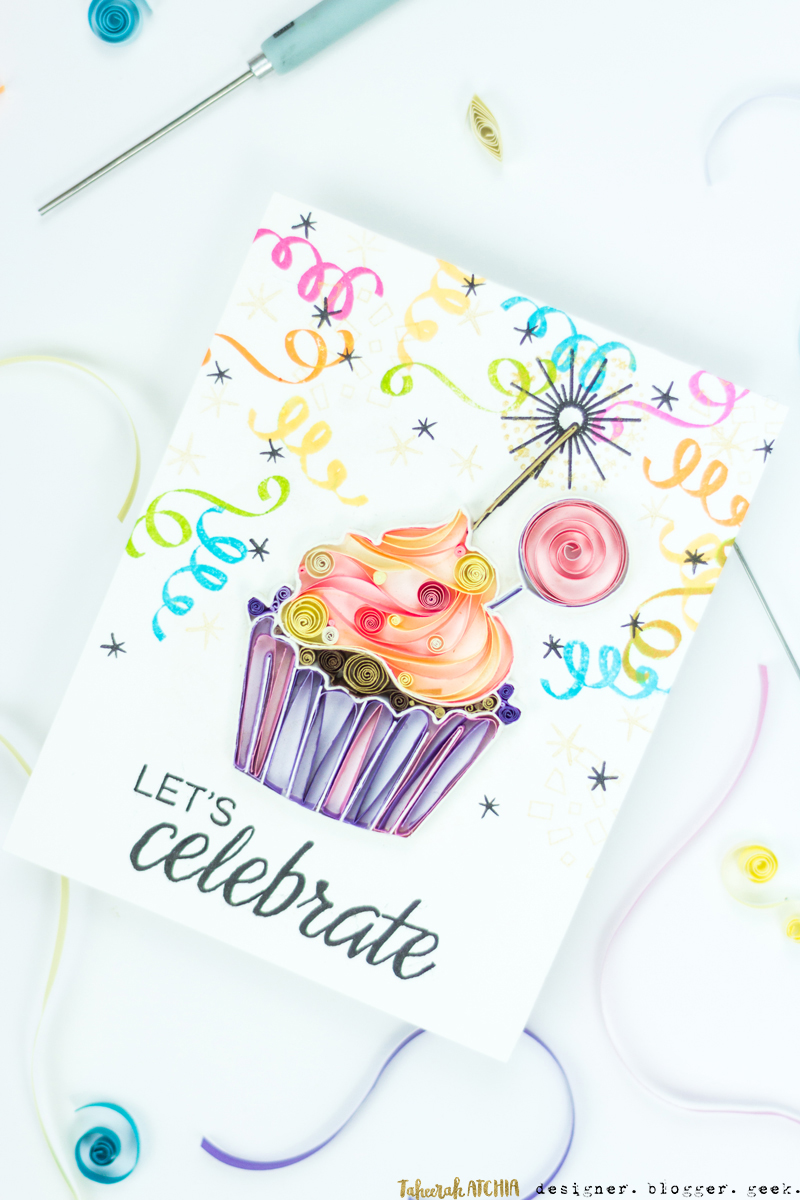
I stamped my sentiment to complete the card when I was done with the quilling.
The entire process was enjoyable and challenging, but definitely time consuming. The entire project took something like 5.5 hours without a break, so I was definitely tired after that! I have to admit that the final result is quite a showstopper, so this kind of project would be ideal for a card for someone special. It’s a bit involved to go creating these as a regular project though.
Impressions And Conclusions
Quilling Art by Sena Runa is an inspiring read, well illustrated, and with a variety of challenging projects. The book takes you through first principles of quilling but the projects do feel a little advanced for a beginner. A novice should find it to be a useful resource, albeit not comprehensive.
The projects are beautiful and imaginative, with clear step-by-step instructions. The templates are a little on the small side for my liking, meaning that some of the smaller coils and shapes can be very fiddly to make. However with some practice and a lot of patience, you can produce a reasonable facsimile of Sena’s work.
The book definitely equipped me with the basics well enough to create my own quilled art, and I definitely learned a lot about composition from studying Sena’s projects both in the book and on her Instagram. With a lot of time and patience I was able to create something I am truly proud of.
I certainly would recommend Quilling Art by Sena Runa to anyone who is already a little familiar with quilling and wants to learn beyond what a kid’s kit would teach. Though not comprehensive, Quilling Art by Sena Runa does cover enough of the basics for someone to get started with quilling – but the projects are definitely challenging for a beginner. Sena’s style and modern take on quilling is certainly more than enough inspiration to keep you going long after you’ve mastered the basics.
I’ll be hoping for a follow-up version in future with additional basic shapes to learn, and some more challenging/ambitious projects for the more confident quiller. In the meantime I have definitely added a couple of extra strings to my (paper) bow – though I don’t think I’ll be giving up stamping any time soon. *wink*
Giveaway!
Hopefully after reading my review and seeing my projects you’re feeling inspired! Would you like to get a head start on quilling with a copy of Sena’s book? I have *two* copies to give away!
To enter simply leave me a comment telling me what’s left you feeling inspired from this post. You have until 23:59EST on Wednesday 7th March to enter. I’ll draw winners shortly after that.
Good luck, and thanks for stopping by!
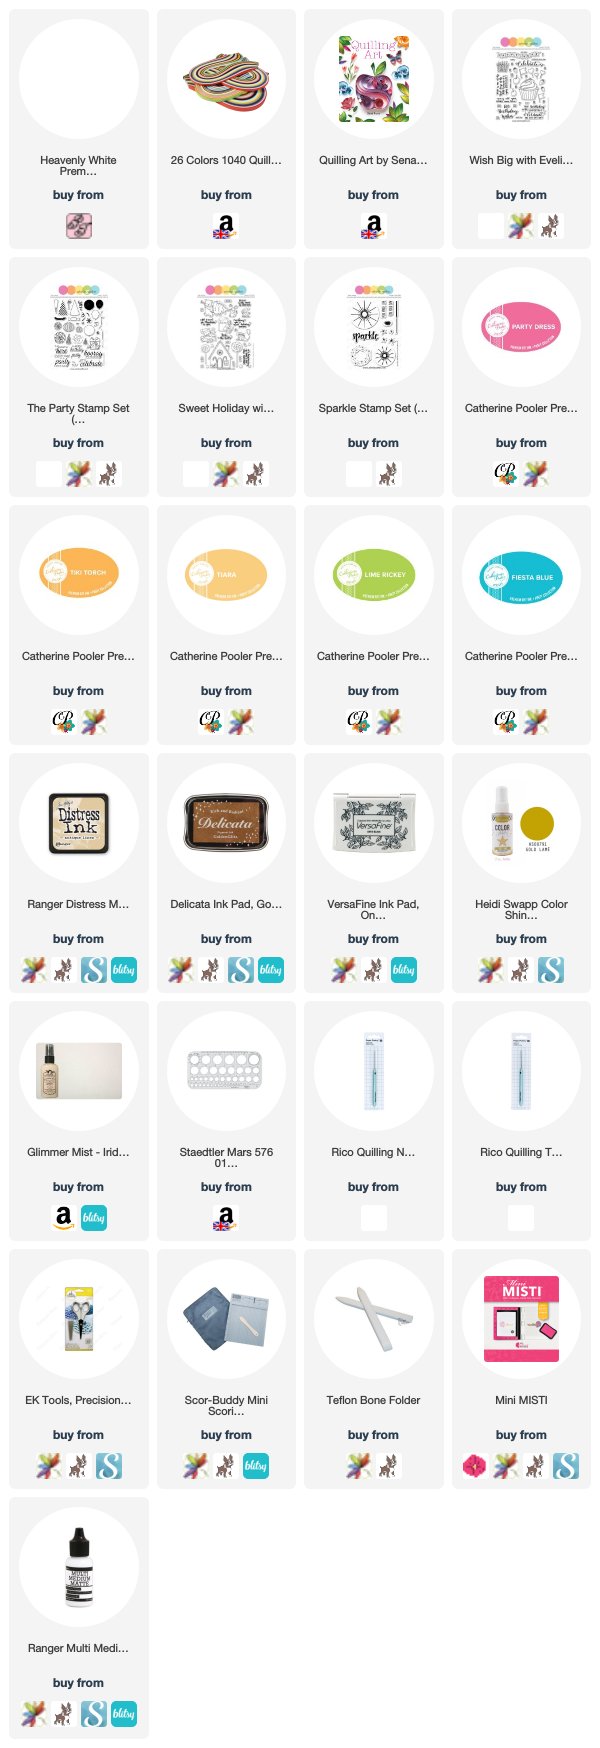
Supplies
Basic Quilling Supplies
Let’s Celebrate Quilled Cupcake Card
After seeing you post it inspires me to watch this book in my own hands?? please please I want this book please give me it’s one copy
Thanks for the review of the book. I have quilled before but never attempted designs with loose coils. Would be delighted to win a copy of this book.
Thanks for your honest review of the book Taheerah! I love both of your projects! Your cupcake is spectacular! I have done some quilling in the past for cards, mostly flowers and geometrical shapes, but nothing as sophisticated as your projects or Sena’s! I love, love this post and you inspire me to have fun with quilling again. Thanks for the chance!
Wow this quilling is absolutely wonderful I really should try it out!
I have been quilling for a few years now and just love it. In process of designing patterns for cards and crafts to sell with quilling and stamping. You did a lovely job. It is so much fun.
Wow thank you for the detailed information. I’ve been interested in quilling but it looks so intimidating. Thanks to this post I may just start … of course real baby steps compared to you. Thanks for inspiration.
Great review—very thorough and honest. If I’m lucky enough to win a copy, I’d send it straight away to a friend going through a very difficult time who has just discovered quilling.
I follow Sena on Instagram and she does beautiful work! I’m so inspired by the cupcake card you made. It’s gorgeous! This looks like a great book to have in a crafty library; thanks for the chance to win.
Hi Taheerah, OMG, I would be so THRILLED to win one of these books. What inspired me was that I have done some quilling before, nothing like what you did or what is in the book, but I purchased a kit a year or so from HSN, the home shopping channel during their craft show, I was so amazed watching this girl demonstrate quilling, again it was just general, nothing as amazing or as in detail as yours or the book. I found it to be the coolest craft, I made little flowers and leaves and put them on my cards at the time and was so proud of myself, now seeing your post I laughed out loud at myself, boy was I stupid, it’s like I was doing work a 2 year old could do when I could of done the work of an adult, I had NO idea quilling went beyond what the kit taught you. When I see the AMAZING and BEAUTIFUL and STUNNING things that are made by quilling in your post, I am wow’d and amazed, I would love to learn this, I saw that guitar, and I thought oh wow can you imagine if someday I could get good enough to make something like that, a lot of work, but ohhh so worth it. Thanks for the chance. Yours is amazing, wow, you must be proud.
wow!
its awesome!
love it!
Your card is fabulous! I have been interested in quilling for a while, but wanted to make the artistic quilled featured in the book. I was also convinced hat I could use my collection of stamps, but had no idea how to combine the two. Thanks for very inspiring post!
Your projects are wonderful! I never thought about stamping a design and then adding quilled shapes to it, very inspiring indeed.
I’m on the fence. I really like the look & as you say, would make a very special card. BUT, do I have the patience? I think I might give this a whirl just to see. The designs in the book are fantastic. Thanks for highlighting this craft.
This was a fun read! I don’t know much about quilling and found this very informative. I would love to give it a whirl!
I never tried it before . I saw many videos for other making them . But I never saw them so cheerful as I saw in this book review . And you know that I know you are so creative and had your own sparkles in your unique cards., but this one is unbelievably gorgeous, amazing , cheerful and pretty. you encouraged me to give it a try . These tool will be in my top wish list.
Boy you are a multi talented lady!!! I have done quilling years and years ago in scrapbooking and made Mickey Mouse ears and such! You blow me away with how you did these magnificent work with the heart and the cupcake!! Love all the bright colors! I still use quilling on projects but not often and not to this extent!! Kudos to you!
Have only done quilling
a couple of times. I love
the pretty designs you
can create with quilling.
Carla from Utah
I have never tried quilling, but you have definitely inspired me to give it a whirl (or a coil – wink)! Your creations are absolutely gorgeous! I’m especially intrigued by the idea of using a stamped image – oh, the possibilities!
Oooooh Taheerah, I love quilling and I also put quilling designs on my cards too if I think its appropriate. I would love a copy of this quilling book so that I can develop my quilling skills further. :O)
Goodness! I have never seen quilling done in such an exciting, explosive way! Your cupcake is absolutely amazing and I’m so happy to see that you a stamp As the basis for your quilling as I would prefer to use some products I already have to do quilling. The only quilling of ever seen before was very boring, basic flowers so to see quilling taken to the next level is awesome. I’d love to have a copy of this book and try out some of the designs.
Really lovely! You are talented in so many ways!
I actually starting quilling way before card making, but didn’t last long, LOL! Thanks for the fabulous inspiration, I should go dig out the old stuff!!!!
What awesome creations! I would love to start with the heart design. It doesn’t look as difficult as some of the others! Your projects using the information in the book turned out beautifully!
Oh wow! I have done some basic quilling before myself, but that was nothing like that! These designs and vibrancy of colours are indeed mind blowing and super inspiring! I’m so impressed with your makes, too – is there anything you can’t do beautifully? 🙂 you’ve definitely inspired me to check out this book, and to dust off my quilling supplies- I still have some in my drawers somewhere, I’m sure!
Wow these are so beautiful and I love the bright colors and the dimensions of the quilling. I bought some supplies on sale a couple of months ago and you’ve inspired me to try it as well as try to add some fun dimensions to the stamps I have.
Beautiful quilling! It’s been a while since I did some quilling but I’m more towards making indian traditional earrings called jhumkas.. you inspire me to try these beautiful framed works ? Wish I get some patience ?
Your cupcake is awesome. I tried quilling and I was terrible at it. I have most of the supplies you mentioned but not a book. Thanks for a chance to win…
I don’t think that I have ever seen quilling designs like this nor colors so vibrant and varied. I have been intrigued by this technique for a long time, but most of what I saw was very pastel . But…what really intrigued me was combining quilling with cardmaking! My head is exploding with possibilities. I really would love to try my hand at this and introduce it to my grand-girls as well . Thanks so much for your offer!
Your two creations are amazing, the cupcake is specially stunning !
I love doing quilling from time to time (but did not for quite a long time actually), and thanks to your fantastic post I know that this book is worth the investment. Thank you for the inspiration and to give me back the envy to do some quilling.
These are all just simply stunning. I am in awe of the artists who create these! I would love to try!
WOWZERS!! Thanks for the review..LOVE the colors. Fab card! I Feeling like I need to get those quilling supplies out of the back of my closet:)) Thanks for the inspiration!
I do have some quilling supplies, you inspire me to dust them out and make some quilled cards.
Gorgeous, I love quilling. I love all the color in your projects. I would love to win this book.
Thanks
Ang
Oh my, that cupcake! I have never tried quilling before, but this looks awesome. Not sure I would have the patience for this:-) Thanks for sharing!
Fantastic review and projects, Taheerah! It’s fun to see how quilling has changed over the years. I’m super inspired by how you combined quilling and stamping for your cupcake card! With such incredible results, too!
Absolutely fantastic Taheerah. I’m blown away by your projects, I think that heart was very faithfully recreated and turned out beautifully (once again helped along by your gorgeous photography). The cupcake is stunning. I’m so inspired by how you’ve integrated your stamping supplies in this way . You know I have tonnnnes of quilling supplies (like, all of them). Once upon a time I was so into it, but then work happened and it went the way of my cross stitch. In recent months I’ve been looking on Pinterest at quilling projects and you’re so right, it’s super modernised compared to ‘our’ day. And so so cool. This post has inpsired me to dig it out and I WILL be making something in the coming weeks. Thank you so much for taking the time to review this book fairly, and let’s get the quilling movement going again. Can you please do Pergamano next 🙂
Jenny x
It’s always good to try something new. Your projects are really great. Thanks for the review.
Wow! This is really cool. I have always admired quilling but never tried it. I love your cupcake and think it’s really inspiring that you were able to create that after such a short amount of time with the book! 🙂 Thanks for the chance to win!
Looks like a really awesome book! The projects look so colorful and amazing!! Your quilling projects are fabulous!! Love how you used the cupcake stamp as a guide!! I actually started cardmaking because of Quilling! A long long time ago (haha) I picked up a calendar that taught you to quill and had easy projects. I really enjoyed it and accumulated the supplies! I have tons of strips and collected books (older ones) and went to work creating!! After creating I wanted to do something with them and that led me to card making because my mom was doing it at the time! And well you can see where that led!!! I never got the hang of using the needle, but liked the quilling tool! I still use the bent tweezers that I used with my quilling, all my other quilling supplies are packed away for the day when I’m done with school and have my own place and craft room again!!
Your cupcake is just magnificent, Taheerah! You rocked the quilling and it is so funny you did a post on this today because I just came across my quilling supplies the other day and said to myself “You know, you really should think about pulling them out and using them on a card again!” And here you are with a post today that shows the beauty of quilled paper with a gorgeous stamped image! I love how you created the cupcake liner – so brilliant! I also love the quilled topper you created using the cherry stamp. I agree, this is definitely a card you make for a very special occasion or person – something that you know they will treasure. I’m inspired to make a quilled card for my mom since she was the one who taught me quilling when I was very young and actually got me started again 10 years ago for a while. So I know she’d love to see a card from me with some quilled creations again. Thanks for the inspiration today, Taheerah!