Hey everyone! Happy Friday! WEEKEND!!!! 😀
I’m playing along, for the first time in *years* with the Papertrey Ink Make It Monday challenge. I haven’t felt inspired enough to play along in the week, but I knew I just had to when the challenge was to create in the style of one of my favourite designers: Danielle Flanders!!
Danielle’s style has been dubbed ‘Modern Whimsy’ but I myself have been calling it ‘Modern Scrappy’ for ages. *wink* Whatever you call it, her style is fantastic and so so inspiring!! I’ve always wanted to try my hand at her style and now is the time!!
So, I gathered a *ton* of supplies (you’ll see what I mean when you get to the Inlinkz below!), and set to work. I decided that this style of card would be much easier for me if I treated it like a ‘mini scrapbook page’, and ended up creating this:

What do you think? I am so *so* in love with this!!!
And what do you think of the photography, by the way? I tried something new. 🙂

I started with a Pure White card base and splattered Heidi Swapp Colour Shine Mists in Blush and Coral, then some Perfect Pearls Mist in Heirloom Gold and Studio Calico Mister Huey’s in Calico Shine. I lightly stamped the confetti dots from Birthday Style using Mama Elephant ink in Blush and Hero Arts Silver ink.

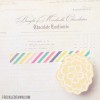
Next came the layers! I started with a Doily Details die cut from vellum and adhered that in place. Next, a piece of patterned paper from the Studio Calico Planetarium Card Kit, cut with the Tag Sale #7 die. This cuts a longer tag, so I repositioned it on the die and cut it again to create a shorter, squatter version. That was adhered in place using Pinflair Glue Gel.

The squares came next. I trimmed a square of vellum and Echo Park Everyday Eclectic patterned paper then die cut the inner square using the Fabulous Frames die. I layered and adhered, one with a little more dimension than the other.

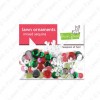
Time for some more stamping! I used Live Life Love to stamp the arrows, and the sentiment from Bigger Blooms on the vertical. I die cut the heart using one of the Tremendous Tag dies, stamped that with one of the stamps from Live Life Love and adhered with Pinflair. I added some Stickles and glitter to bling it up!

Coming towards the end of my layers, I die cut another Tremendous Tag die, then stamped with the confetti dots again and the heart/sentiment from Live Love Life. I adhered that in place with lots of Pinflair, sandwiching in place some Sterling Silver cord.

For finishing touches, I adhered some sequins from the Lawn Fawn Peace Joy Love Mixed Sequin Pack, and some from Cotton Candy sequins from Neat & Tangled. I added a little washi tape and called it a day – after stamping some tiny hearts from Simple Valentine and Boutique Borders: Love to complete the look!!
I hope you’re still with me and have enjoyed all the eye candy!! I’m very proud of this card! 🙂

Right, I’m off for now, but I’ll be back later to announce the winner of StampSpotlight! Thanks so much for stopping by, I would love it if you left some love before you went on your way!
Supplies:


lovely! Although you used a lot of stuff it all coordinates nicely together!
Your card is absolutely beautiful Taheera!! I love all the layers and the twine is the perfect touch! Love!!
so soft and beautiful! love love all the details on the background. fabulous card, girl!
Absolutely love your beautiful card! Love the way you opened up some of your layers.
Beautiful card!
Gorgeous card, T.! A perfect take on the challenge!
So pretty, Taheerah! I love the soft pastels and all those yummy layers!
Love your Modern Scrappy style! The layering are light and airy! The use of elements is pleasing to the eyes! Beautiful!!!!!!!
So pretty! I love that shimmery twine, the sequins, all that lightness and brightness and softness, gorgeous!
You did a wonderful job with "modern whimsy!" Although, it's not really a stretch for you … your projects always seem to follow this style on some level. Love your layers, and how some of them are open. I think that really helps keep it modern and fresh. Otherwise you just get too much stuff. You've successfully avoided this, and created a really beautiful card to be proud of.
PS … way to go on your Moxie Fab post. You rock, girlfriend!
Love this card, super cute!
Wish I could glimpse your craft room right now with all these 'creating' tools scattered about! Well worth the effort. Love that you made whimsy your own! Super happy, and yes, full of eye candy!